I love potatoes!! Whether they are mashed, scalloped, baked, roasted...you name it. But probably my favorite potato is the baked potato. I had childhood memories of going to Carl's Jr to get my broccoli and cheese potato. Don't think they have it anymore.
The problem with making baked potato is that it takes an hour in the oven! Found several recipes on how to make quick baked potatoes. It worked!!!
Quick Baked Potato
Prep Time: 5 min Cook Time: 25 min
Ingredients:
Russett Potatoes (Mine were small)
Directions:
Preheat the oven to 400F. Wash the potatoes. Poke some holes with a fork. Place them in the microwave oven for five minutes.
Place the potatoes on a baking sheet/pan. Bake them in the oven for twenty minutes. They are done!!! Yes, it really was that simple. Cut down the time from one hour to half an hour. Woo-hoo!!
With a knife, make an incision on the top so that the steam can escape. Add butter and other toppings desired.
Enjoy!!
*Note: I did this a second time. Before I put it into the microwave oven, I put some white truffle oil on the potato and sprinkled some sea salt. Love the aroma of white truffle oil!!
Monday, November 19, 2012
Tuesday, November 6, 2012
Homemade Healthy Lasagna 1
Mmm... lasagna!! I have wanted to make homemade lasagna for a while now. When there was a sale on Barilla lasagna noodles, I thought it was time.
I only used cottage cheese. Typically, lasagna is made with ricotta cheese but it was three times the price of cottage cheese. Besides, cottage cheese is low-fat, low calorie, low carbs, high in calcium, and high in protein.
Nutrition facts for you Cottage Cheese vs Ricotta Cheese (Click on pic to enlarge)

Homemade Healthy Lasagna
Prep Time: 25 min Bake Time: 45 min
Ingredients:
Lasagna noodles
1 onion (diced - I used a brown onion)
1 lb ground meat (I used lean turkey)
1 lb pasta sauce
12 oz tomato paste
1 lb cottage cheese
1 egg
3 tsp parsley
2 tsp basil
1 1/2 cups of shredded cheese
1/2 tsp salt
1/2 cup parmesan cheese
Directions:
On medium heat, cook the diced onions to soften. Add the ground meat. Stir to cook until the meat is browned. Remove most of the liquid in the pan.
Put the pan back on medium heat. Add the pasta sauce, tomato paste, 2 tsp parsley, 2 tsp basil. Set aside. (Meaty sauce layer)
Meanwhile, in a bowl, mix the cottage cheese, egg, salt, half cup parmesan cheese, and one tsp parsley. (Cottage cheese layer)
In an 8x8 pan, begin the lasagna building.
At the bottom, place lasagna noodles so that they slightly overlap. Next, evenly spoon and spread the cottage cheese layer. Sprinkle a layer of shredded cheese on top of that. The fourth layer is the meat sauce. Repeat.

(I only did the layering twice.)
The top layer will be the meat sauce. Sprinkle Kraft parmesan cheese generously to top it all off.
It is very heavy!

Bake in the oven for 45 minutes at 350F. Cut and serve!!

It was much healthier than other lasagna, but it still tasted quite sinful!! heheh.
(Next time, I will skip the tomato paste.)
Enjoy!!
Note:
If you want to cut down the bake time, you can cook the lasagna noodles al dente before you start layering your lasagna. If you do cook your lasagna noodles first, you only need to bake your lasagna for 20-25 minutes.
Monday, October 15, 2012
Stuffed Red Bell Peppers
Last week, I saw a produce special of $0.33 per red bell pepper. This is what I came up with from my pantry. I've realized that the reason why my grocery bill is lower than other people's (besides being a great shopper, buying seasonal produce, etc) is that buy little or no meat. Originally, I wanted to put ground turkey into my stuffed red bell peppers. However, after the addition of pine nuts and walnuts, it wasn't needed.
Stuffed Red Bell Peppers
Prep Time: 25 min Bake Time: 20 min
Ingredients:
1/2 cup onion (diced)
1 cup frozen spinach
1 medium red potato (diced)
1/4 cup pine nuts
2 large red bell peppers
8 mushrooms (diced)
1/4 cup walnut (in pieces)
3/4 cup cooked brown rice
some oil (I used grapeseed oil)
salt and pepper to taste
Directions:
In a pan on medium heat, caramelize the diced onions. Add potatoes about three minutes later. Onions and potatoes take longer to cook. Next add the frozen spinach and pine nuts. Throw in the mushrooms, walnuts, cooked rice last. Salt and pepper to taste.
The filling can be easily changed based on what is in your pantry. The staples for this stuffing are onions, spinach, and mushrooms.

Cut the bell peppers in half. You can either make the incision by taking the top off like when people carve pumpkins or you can halve it the other direction. This depends on the shape of your bell pepper.
Spoon the filling to stuff the pepper.

I sprinkled some parmesan cheese on top for slight crunchiness. After baking the stuffed bell pepper for 20 minutes. It is done. There you have it!! Vitamin C, vitamin K, iron, omega-3 fatty acids, antioxidants, fiber, etc of textured goodness. =)

Enjoy!! =)
*Note: You can do it stuff small or large bell peppers.
Saturday, October 13, 2012
Simple Brussels Sprouts
My favorite salad is my brussels sprout salad that I make every week or two. That salad uses the leaves. It is a waste to throw away the core when it's half of what you buy. I cook the middle. It is like buying small brussels sprouts.
My husband likes this simple preparation. On other occasions when I have made it fancier with different spices and such, this has been his preference. Makes my life easier too since it takes less time. *wink*
Simple Brussels Sprouts
Prep Time: 10 min Cook Time 8 min
Ingredients:
brussels sprouts (halved)
some olive oil
salt and pepper to taste
Cut the brussels sprouts in half. Put some olive oil in the pan. Place the halved sprouts flat side down.
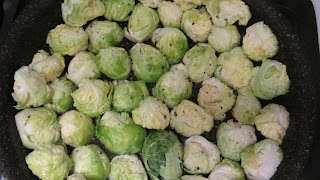
Cook covered on medium heat for about five minutes.

Remove the lid, move the brussels sprouts around so that the other side gets some of the char too (about another three minutes). Sprinkle salt and pepper to taste.

Simple. Tasty.
Enjoy!!! =)
My husband likes this simple preparation. On other occasions when I have made it fancier with different spices and such, this has been his preference. Makes my life easier too since it takes less time. *wink*
Simple Brussels Sprouts
Prep Time: 10 min Cook Time 8 min
Ingredients:
brussels sprouts (halved)
some olive oil
salt and pepper to taste
Cut the brussels sprouts in half. Put some olive oil in the pan. Place the halved sprouts flat side down.

Cook covered on medium heat for about five minutes.


Simple. Tasty.
Enjoy!!! =)
Friday, October 12, 2012
Ginger Sparkler
I bought some ginger recently to use in my cooking. Thought I would try to make some type of ginger drink. So I started to boil thinly sliced pieces of ginger with 1.5 - 2 cups of water in a little pot. Boil for 20 minutes for a spicy drink.
Placed several ice cubes into a big mug. Poured the boiled ginger water into the mug about 3/4 full. Add a tablespoon of honey. Stir until it dissolves. The ice cubes will cool down the drink quickly. To top off the drink, add 1/4 cup of sparkling water.
Ingredients: ginger, water, honey, sparkling water
Enjoy your ginger sparkler!! =)
Tuesday, October 9, 2012
Spinach Mac & Cheese
I LOVE SPINACH.


It is one of my favorite vegetables (besides broccoli and tomatoes). Raw, Steamed, Stir fried, in soups, you name it. My husband, on the other hand, does not enjoy spinach as much. The way to hide spinach and other nutritious vegetables is to turn it into a casserole or put it in a pasta dish. Since I had some macaroni in the pantry, I finally decided to make Spinach Mac & Cheese.

Spinach Macaroni & Cheese
Prep Time: 20 minutes Cook Time: 25 minutes
Ingredients:
12 oz macaroni
3 Tblsp butter
1/2 cup diced onions
1/3 cup flour
3 cups milk (the more fat, the better)
6 oz spinach (chopped)
2 cups cheese
Directions:
Prepare macaroni as per directions; boil a pot of water with a bit of salt. Cook macaroni for 8-10 minutes. Strain and set aside.

In a large pot, melt three tablespoons of butter. Sautee the diced onions to soften them. Whisk in 1/3 cup of flour. The mixture should be a brown color. Pour in the milk. Turn the heat up to high for 10 minutes. Add salt and pepper to taste.
Stir cheese into the mixture. Add chopped spinach to the mixture. Lastly, add cooked macaroni into the pot.

* I added fresh ground peppercorns on top.

* I added fresh ground peppercorns on top.
Enjoy!! =)
TIPS:
1) I usually prepare and chop/dice veggies before anything else.
2) If you do not have macaroni in the pantry, you can use any kind/shape of pasta.
3) Stack the fresh spinach on top of each other so that you can chop more into strips at one time.
4) I was too excited about eating my dish. If I wasn't, I would have put it in a casserole pan. Sprinkle some breadcrumbs on top to create a crunchy top.
Tuesday, October 2, 2012
Fresh Santa Barbara Uni (Sea Urchin)
On a recent mini-vacation to Santa Barbara, we biked to the pier to Santa Barbara Fish Market to try fresh uni!!

It was the first time we have seen the sea urchin cleaning. They sell it for $5.95 per pound. The sea urchin is weighed. Ours came out to be a pound. Then the cleaning began.

The shucking tool was used to create a hole in the center. The uni is turned upside down. Guts flew out. It was pretty disgusting. I did not take pictures of the guts. With a large knife, the uni was cut in half. Working with the halves, the shucking tool helped scoop the uni from its shell. A container is filled with water and ice. The uni pieces were placed in the cold water to wash the rest of the guts off.
Our one pound live sea urchin turned into five pieces of sweet, fresh uni ready to enjoy...

This was the sweetest uni I've ever tasted!! FRESHEST and SWEETEST!!! =)
(Click on the picture for a larger view.)
On a side note, we ordered these gigantic oysters too. Hope Ranch Oysters were local oysters that they were charging only $1.09 each. Such a great deal since they chose good ones for us that were six inches long and 1.5 inch wide. WOW..

Now, that was a delicious afternoon snack!!! =)
Thursday, September 20, 2012
Macadamia Nut
Macadamia nuts grow on trees. They have two hard shells. Squirrels must have sharp teeth because it took me a while to open one. This was the first time that picked them off the trees.

When you pick the nut from the tree, it has a hard, green shell. After a couple days, the green shell cracks open...

When the green shell opens, it is fairly easily to get to the inside nut. You have a brown shell that is more difficult to crack that the outer one.

I had to clamp the nut down so that I could hammer the inside shell open.

After several hits, the brown shell finally feels the impact.

Here is a close up of the macadamia nut:

Out of the shell!!!

All that time and effort for one nut!! I go outside to crack one nut. After a minute or two, I attempt to crack another nut. Never timed how long it takes to unshell five nuts. They have machines that can crack hundreds of nuts within the amount of time that I cracked a few.
Just thought I'd share!!
Tuesday, September 18, 2012
Lentil Bean Vegetable Soup
So you want a meal that is filling, flavorful, and nutritious?
Lentil Bean Vegetable 'Soup'
Prep Time: 20 min Cook Time: 50 min
Ingredients:
dried lentils + beans (I buy a mix of many different kinds)
1 diced onion
1-2 Tbsp minced garlic
3 small red potatoes (but use how many you want of whatever variety you choose)
8 mushrooms
1 large bell pepper
2 cups (1 can) chicken broth (or vegetable broth)
3 cups water
1 Tbsp italian seasoning
cayenne pepper (optional)
Directions:
Soak the dried lentils and beans in water for an hour. Rinse them in a colander.
Chop all your vegetables and set aside. If you can't do it all at the same time, I recommend dicing the onion first. In a medium sauce pan, heat oil, onion, garlic like in the last post. After you have created your onion-garlic mixture, you may all the rest of the chopped vegetables. Continue to stir with a wooden spoon on medium heat. Set aside when cooked (about 5 minutes).
Pour the chicken broth and water into a huge pot. Add the lentils, beans, onion-garlic-veggie mixture, and seasonings (italian and cayenne pepper) also. Give it a stir or two. Cook on medium heat with the lid for about half an hour.

This recipe can be modified depending on what you have on hand. If you do not have bell peppers or mushrooms, don't worry about it. Chop some celery and carrots in. If you don't want to use italian seasoning, you can add cumin or basil/parsley. You can experiment to taste. Let me know which seasonings and veggies you prefer in the 'soup'. I have soup in quotation marks since mine turned out to be quite hearty and chunky, not so soupy. You may add another 2 cups of chicken broth and 3 cups of water if you like, but I try my best to cut as much sodium as possible (which is why I only use 2 cups of chicken broth). You can add more or less soup but I just scooped out the veggies.

Enjoy!!!
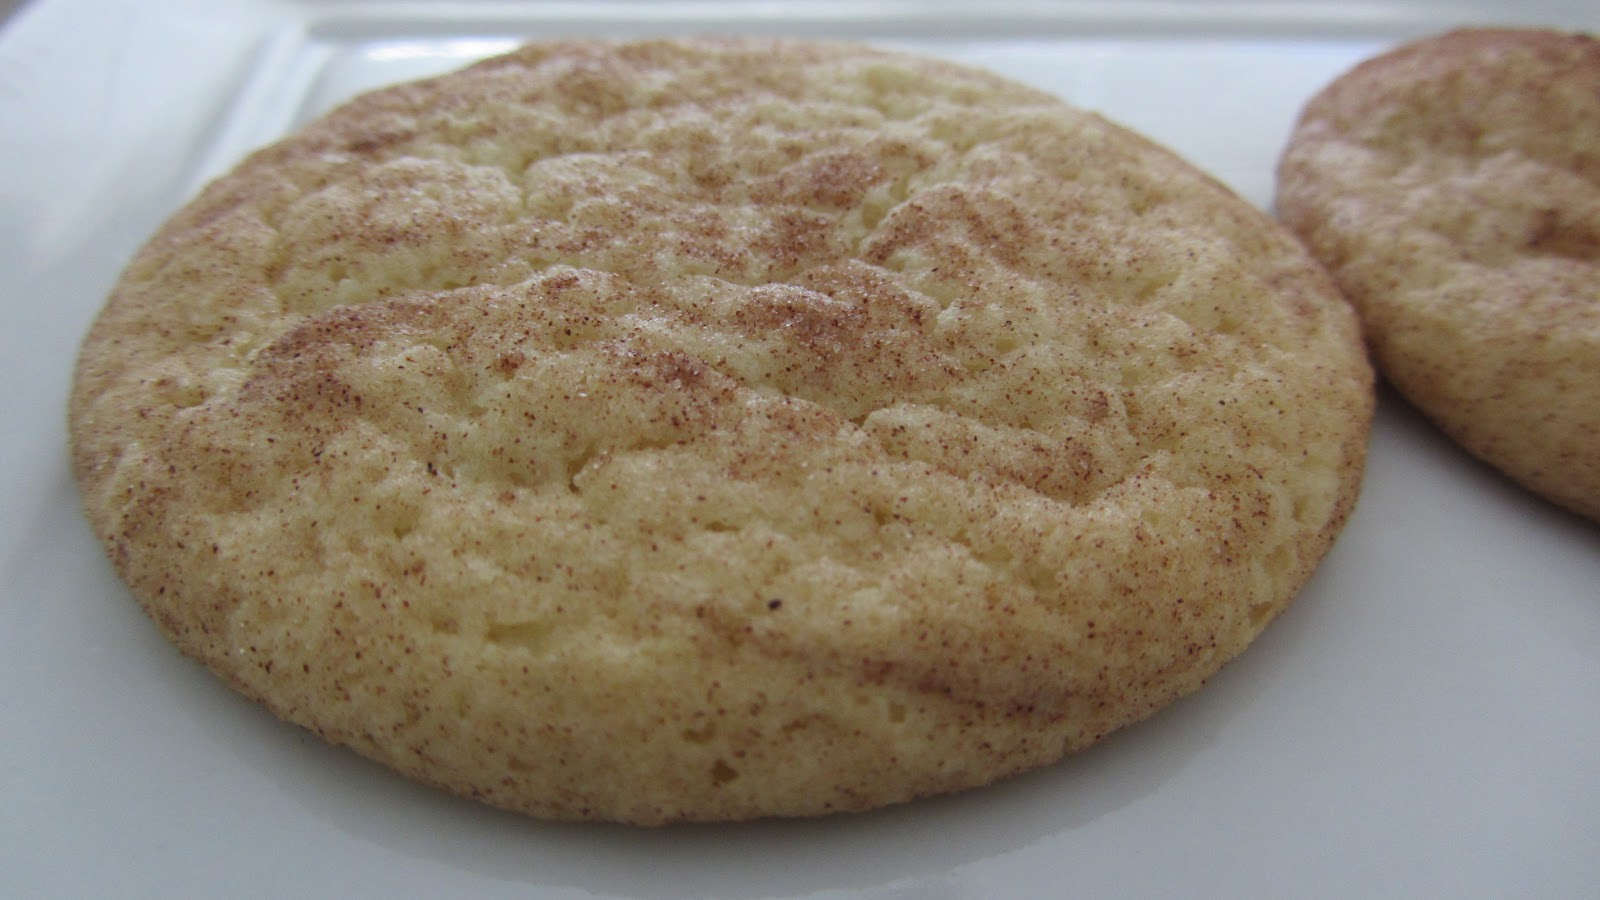
Snickerdoodles!!
*Just dessert. Not a modified healthy version. heheh.*
Many recipes use cream of tartar. It is quite expensive at the store. A tip that a grocery store employee gave me was to use cornstarch as a substitute since the texture/consistency was the same. I decided to do without it altogether. I went with good ole Martha!
Martha Stewart’s Snickerdoodles
makes about 1 1/2 dozen
makes about 1 1/2 dozen
2 3/4 cups all-purpose flour
2 tsp baking powder
1/2 tsp coarse salt
1 cups (2 sticks) unsalted butter, room temperature
1 1/2 cups sugar
2 large eggs
...and...
2 tbsp sugar
2 tsp ground cinnamon
2 tsp baking powder
1/2 tsp coarse salt
1 cups (2 sticks) unsalted butter, room temperature
1 1/2 cups sugar
2 large eggs
...and...
2 tbsp sugar
2 tsp ground cinnamon
Preheat oven to 350F. Sift together flour, baking powder and salt into a bowl. Put butter and 1 1/2 cups sugar in the bowl of an electric mixer fitted with the paddle attachment. Mix on medium speed until pale and fluffy, about 3 minutes. Mix in eggs. Reduce speed to low; gradually mix in flour mixture.
Stir together cinnamon and remaining 2 tablespoons sugar in a small bowl. Shape dough into 20 (1 3/4-inch) balls; roll in cinnamon sugar. Space 3 inches apart on baking sheets lined with parchment paper.
Bake cookies, rotating sheets halfway through, until edges are golden, 12 to 15 minutes. Let cool on sheets on wire racks. Cookies can be stored between layers of parchment in airtight containers at room temperature up to 3 days.

I used an ice cream scooper to make the balls of dough even. My cookies were all about the same size. Lined my pans with silpat (non-stick silicone). I love using silpat since you can remove them from the pan. It leads to quicker cooling time.
These snickerdoodles were perfect...chewy cookies that were not too sweet.
Enjoy!!!
Thursday, August 30, 2012
Light & Healthy Stuffed Mushrooms
I have made amazing stuffed mushrooms before. It is really quite easy. I don't remember exactly what I used last time since each time it depends on what is in my fridge and pantry.
This time, I was thinking about how I could make a version that was lighter and healthier. Many recipes call for cream cheese. After sifting through many recipes while thinking about what I had on hand, I concocted a recipe. I'll have to say that not only was it healthy but it was the best tasting!!
Light & Healthy Stuffed Mushrooms
Ingredients:
6 Large Mushrooms
1/2 cup shredded cheese
1 cup chopped spinach
some walnuts (in pieces)
1 small onion (1/2 large onion)
dice some ham
salt, pepper, paprika
some crackers
Directions:
Preheat the oven to 350F. Clean and hollow out the large mushrooms. Set aside. (Note: When I hollow out the large mushrooms, I actually dice that part of the mushroom to put into the stuffing mixture. That way you don't waste it.)
In a skillet, heat the olive oil on medium heat. Add chopped onions. Saute for about four to five minutes. When onions soften, add chopped spinach. Stir well. Add shredded cheese (American, Swiss, or cheese of your choice), some ham and crushed walnuts. Add seasonings (salt, pepper, paprika) to taste.
Remove from heat. Spoon the mixture into the mushroom caps.
Put some crackers in a plastic bag. Crush it so that you create breadcrumbs. Top the stuffed mushrooms with the crushed crackers.
Place on a baking sheet. Bake for 20 minutes.
These stuffed mushrooms are simply delicious. It won't leave you feeling heavy like most restaurant stuffed mushrooms.
ENJOY!!! =D
Wednesday, July 25, 2012
Mango Guacamole
Oh how I love California Avocados. Currently, mangoes and avocados are in season (among other summer fruits and veggies). I was looking at what I had on hand to see what we were going to have for dinner. I decided to make a mango guacamole.
Mango Guacamole
Prep Time: 15 minutes
Ingredients:
1/2 onion (diced)
1/2 mango (diced)
2-3 small avocados
squeeze of lemon juice
salt and pepper to taste
Directions:
Chop onions, mangoes, and avocados. Place in a bowl and mix with a fork. Cut a lemon in half. Squeeze some juice from the lemon on top of the mixture. Sprinkle some salt and pepper to taste.
Our dinner was an open-faced sandwich.
Toasted the wheat bread slightly. Spread a layer of the mango guacamole. Then I put a layer of shredded rotisserie chicken. Topped it with sliced pieces of Toscano Cheese (specifically, Toscano Cheese soaked in Syrah from Trader Joe's).
A plate of strawberries, a bowl of orange cherry tomatoes, and the rest of the cut mango complimented our meal well.
My favorite tomatoes are the orange cherry tomatoes. They are only available in the summer for a couple weeks. They are a sweeter variety than other cherry/heirloom tomatoes. I first discovered them at the farmer's market a decade ago. That and rainier cherries (the white cherries) are two of my favorite fruits in the summertime, besides strawberries of course.
I love getting a 1-lb of basket of strawberries for 88 cents!! =) love in season prices!!
Enjoy!!
*Note:
To make regular guacamole, omit the mango.
To create your own flavors add what you want! Have fun!!
Wednesday, July 4, 2012
Cold Noodles
When the weather becomes hot, cold noodles are a great solution to an easy meal. I love making cold noodles because you can make it the night before. For the thicker noodle, I use Quon Yick Noodle Co's "Chinese Style Dry Noodle". For a thinner noodle, you can use soba noodles or other noodles of similar thickness.
Taiwanese Cold Noodles
Cook Time: 7-8 minutes Prep Time: 20 min
Ingredients:
Noodles (This time I used 5 bunches of thin noodles.)
Sesame Oil
Persian Cucumbers
Bean Sprouts (Optional)
Carrots (Optional)
Sauce:
2 Tbsp sesame paste
Hot Water (1/2 cup is sufficient, you don't need to use it all)
Peanut Butter (but you can leave it out if someone has a peanut allergy)
1 Tbsp minced garlic
1 Tbsp rice vinegar
1 tsp sugar
1 tsp hot sauce
Depending on how many meals of cold noodle you wish to cook at a time or how many people you need to feed, the quantity will vary. I fill a big pot with water. Heat the water on medium or high heat. When the water begins to boil, throw in the noodles. Use chopsticks to move them around making sure they don't stick by stirring occasionally.
Instead of following the noodle package directions by reading how many minutes to boil the noodles, I grab a noodle with my chopsticks to taste it. This is how I know if it is cooked al dente or not. If it is a bit hard, I will cook it for two more minutes until I try it again.
Here is the trick to making cold noodles...
When the noodles are done, put a big strainer in the sink. Pour the noodles in. Immediately run the noodles with cold water. If you do not do this thoroughly, the noodles will begin to stick. Make sure all of the noodles are not warm anymore before turning off the cold water.
Next, after a good straining, throw the noodles into a bowl. Pour one to two tablespoons of sesame oil on the noodles. Mix well so that the sesame oil is worked into the noodles.
On to the sauce...
Boil some hot water. Place the sesame paste and peanut butter into a medium size bowl. Add two to three tablespoons of water. With a spoon, mix well until the sesame paste and peanut butter are in the sauce (this means to make the sauce as thin as possible). If you still have chunks of sesame paste or peanut butter, then you need to add more hot water to help you break up the chunks.
Add minced garlic, vinegar, and sugar to the sauce. If you like it spicy like I do, add hot sauce (I use Yank Sing).
Additions...
Wash some bean sprouts, slice persian cucumbers and carrots to add to your noodles. You may add shredded chicken if you like also.
I usually keep the noodles, sauce, and chopped veggies separate from each other. When you are ready to consume a bowl of cold noodles, you can add the amount of sauce and veggies to them.
Put it in the refrigerator. Any time you are ready to have your cold noodle meal, it will be waiting for you.
Enjoy!!!
Friday, June 22, 2012
Pineapple Water
There is nothing like having vacation dreams.. Last month, I was in Kauai and Oahu. If you go to the groceries stores there, pineapple and papayas are much cheaper than bananas and strawberries. When I saw a pineapple sale in HMart, I had to get in on the bargain.

Being back in Hawaii reminded me of how wonderful it was to have ice cold pineapple water in the lobby of the Sheraton Hotel. Every time I would walk by, I would drink a couple small cups to hydrate. Perfect alternative to the typical lemon water. Wonderful for summer!!
Pineapple Water
Ingredients:
Pineapple
Water
Ice (Optional)
Cut up pineapple. Use about one pineapple per gallon. Add water and ice (if desired). I usually don't add ice since I let it infuse in the refrigerator for an hour or two.
Refreshing!!
Notes:
You can do the same for many fruit and vegetables. Be creative!! Use what you love. =)
Here are some ideas:
Cucumber Water
Strawberry Water
Watermelon Water
Lemon Water
Sunday, June 17, 2012
Salted Caramel Ice Cream
Summertime is a perfect opportunity to make sweet treats. I, myself, eat ice cream all year round but that's just me. Lately, I've been wanting to try a salted caramel ice cream recipe. My favorite one is from Carmela Ice Cream in Pasadena, CA.
Whenever I try a recipe, it means that I have sifted through many many of them until I finally have a winner. This one is from Cooking Light. Debated for weeks until I purchased heavy cream. Yes, I know that this recipe only calls for 1/4 cup of it but I usually make my ice cream without it.
Salted Caramel Ice Cream Recipe (from Cooking Light)
Cook Time: 10 minutes Prep Time: 10 minutes
Refrigerate Time: 2 hours
Ingredients:
3 1/2 cups 2% milk (I used Vitamin D milk)
3 large egg yolks
1 1/2 cups brown sugar
1/4 cup heavy cream
1 Tbsp butter
1/2 tsp sea salt
1/2 tsp flake salt
Directions:
In a medium pot, heat up milk (but not to a boil). Whisk in egg yolks. Remove from heat.
In another pot, put the brown sugar, heavy cream, and butter in on low heat for three minutes. After the sugar mixture is done. Remove from heat. Add sea salt. Pour the sugar mixture slowly into the milk mixture stirring constantly.
Place mixture in the refrigerator for at least two hours. When mixture is cold, follow directions for your ice cream maker. (It takes about half an hour.)
When serving your salted caramel ice cream, scoop ice cream into bowls. Sprinkle some flake salt or sea salt on top of the ice cream.

Enjoy!!!
Saturday, June 9, 2012
My Bistro Salad
When people say that salads are not delicious, it's because they don't know how to make one. You aren't supposed to just cut lettuce and splash some salad dressing. C'mon people...
A great salad is one that people dream about and crave. Satisfying to the tastebuds with tons of texture. Not only that but it is highly nutritious too. The ultimate salad needs to have elements of crunchiness like nuts as well as soft ingredients such as tomatoes and beets with more flavor like salami, ham, and cheese.
Delicious Bistro Salad
Prep Time: 20 min
Ingredients:
romaine lettuce
just a handful of walnuts (chopped)
1 slice ham (diced)
8 oz or 2 baby beets (chopped)
2-4 slices of salami (diced...a little goes a looong way)
1 roma tomato (diced)
2-3 oz cheese (sliced, cut into small pieces)
sunflower seeds (optional)
fresh ground pepper
salad dressing of your choice
Servings: 2 big salads or 4 small ones.
There's a lot of chopping involved. If you have choppers, you can prepare this salad faster but I just use a cutting board with a small knife.
Grab a big bowl for tossing everything together.
Start by cutting the romaine lettuce (or other lettuce of your choice).
I tend to prepare my salad by adding the dry ingredients first followed by ingredients of increasing moisture (tomatoes are last).
Then add the walnuts and cheese. Throw all the other ingredients into the bowl when you are done chopping except for the bottom three ingredients.
Add two to three tablespoons of salad dressing. Toss your salad well. Plate the creation.
Top the salad by sprinkling sunflower seeds on top and fresh ground pepper.
ENJOY!!!
If you wish to make your own dressing, lemon viniagrette is easy.
Did you know that lemon vinaigrette does not contain any vinegar? *chuckle*
Just mix all the ingredients. Refrigerate the unused dressing for next time (Use within a month).
Lemon Vinaigrette
Yield: 1/4 cup
1/4 cup olive oil
2 Tbsp lemon juice
1/2 tsp dijon mustard
1 tsp minced garlic
1/2 tsp salt
fresh ground pepper
*Note:
Cheese - My current favorite is the Toscano Cheese soaked in TJ (Trader Joe's) Syrah. Other similar tasting cheeses are Manchego and Iberico. I adore Spanish Cheeses.
Other salad ingredients - chopped olives, corn, white or black beans, diced avocadoes...the possibilities are endless!!!
Salad dressing - You can make your own dressings. I included a lemon vinaigrette dressing. This time I used Champagne Vinaigrette (TJ's, of course). My favorite Trader Joe's salad dressing so far has to be the Poppy Seed Dressing.
Monday, May 14, 2012
Easy Salsa Cod
At my house, I make fish once per week. I never understood why fish is considered difficult to cook correctly. I'm going to share with you one of the easiest ways to make fish. Many people complain that their fish doesn't turn out moist enough. The trick is to have enough liquid in the pan. You don't even have to marinate this recipe.
Easy Salsa Cod
Prep Time: 2 minutes Cook Time: 10 minutes
Ingredients:
1 lb cod (or any white fish)
salsa (I don't usually measure but about 1/4 cup is enough)
Directions:
Place fish in a pan with a lid. Pour salsa on top of the fish.
Turn on the burner on medium heat. Cover the pan with a lid.
Cook for 10 minutes. DONE!!
Tips:
1) Use filleted fish.
2) You peek to check the fish after 5 or 7 minutes. If it looks like it is lacking liquid, add some water (or I like to add a little rice wine).
3) I use Pace Picante Chunky Medium Salsa.
Enjoy!! =)
Thursday, April 5, 2012
Chewy Coconut Cookies
My dear friend is a coconut lover. Her husband doesn't like it so she doesn't bake coconut desserts often. This is one of the baked goods for her birthday...chewy coconut cookies. My preference was finding a recipe where the cookie was slightly crunchy on the edges and chewy in the inside. These were perfect!

Chewy Coconut Cookies
Prep Time: 20 min Bake Time: 10 min
Yields: 3 dozen cookies
Ingredients:
1/2 cup brown sugar
1/2 cup granulated sugar
1/2 cup butter (1 stick)
1 1/4 cups flour
1/2 tsp baking soda
1/4 tsp salt
1 egg
1 tsp coconut extract
1 cup shredded coconut
Directions:
Preheat the oven to 350F. Cream sugars and butter. Add egg and mix well.
In another bowl, mix the dry ingredients: flour, baking soda, salt.
Now, pour the dry ingredients into the first bowl to mix.
Add coconut extract and shredded coconut. Stir until there is coconut in all the batter.
Make little flattened balls of coconut to place on your baking pan or silpat (whichever you prefer).
Mine are about 2-3 inches in diameter.
Bake for 10 minutes. Initially when you take them out of the oven, they will still be soft. Remove from heat to let them cool.

I wrapped mine in plastic, put tissue paper around it since it was a gift.

Share them with your coconut-loving friends.

Enjoy!!! ;)
Monday, April 2, 2012
Curried Cauliflower Broth
If you want a light, nutritious soup, try this one. I made it up as I was cooking. ;)
Curried Vegetable Broth (with Fish)
Prep Time: 10 min Cook Time: 30 min
Ingredients:
2 cups broth (chicken or vegetable)
1 head cauliflower (about 2 lbs, chopped)
2 tsp curry powder
pepper to taste
4 cups water
1 lb fish (cut to small pieces)
1 onion (chopped...I used leeks this time)
Directions:
Pour broth and water into a huge pot. Add cauliflower and any other veggies you wish. After the vegetables soften for about 10 minutes, you may put pieces of fish in also.
I sauteed leeks cooked in a little oil with salt/pepper to taste but I recommend chopping and caramelizing an onion. After they soften (about 5 minutes), add it into the huge pot.
Enjoy!!!
Wednesday, March 14, 2012
The Versatility of Chopped Vegetables
Namely, onions.
Red, yellow, white onions add amazing fragrance and flavor to dishes. Usually, I go with red or yellow. Then I dice the onions. Heat (Medium Heat) up about a tablespoon (or two) of oil (olive or grapeseed) in a pan. Throw the diced onions in and stir with a wooden spoon. I read that you are supposed to cook with a wooden spoon and serve with a metal one. The reason you cook with the wooden spoon is to protect your pots and pans from scratches. It takes about five minutes.
After you have translucent diced onions, you can add garlic. Do not add garlic too early or else it will burn.
That should make many of your dishes more flavorful. ONIONS and GARLIC. Mmm...the house will smell wonderful!!
What I like to do is add other veggies too. In this photo, diced italian squash and mushrooms are in the onion-garlic mix. (Add bell peppers for more color and vitamin C. In this case, I already diced enough and decided to save the bell pepper for a dish the next day.)

I was making my pasta sauce chunkier. All I do after is pour the pasta sauce of my choice.
 Sure, the label claims that it is "Chunky" but I make mine much chunkier. I feel that it isn't worth making my own red pasta sauce since the cost of the ingredients and amount of time and effort would be much more than grabbing it at the store since I usually buy mine for $1 in bulk when it is on sale. Make sure when you buy sauces from jars that there are no artificial flavors. *Didn't take a photo of the chunky pasta sauce.* I was too hungry.
With the diced sauteed vegetables, not only could you make it part of your pasta sauce.. You can also add the mixture to an omelette, casserole, crepe, enchilada, mapo tofu, etc. The possibilities are endless.
ONIONS and GARLIC are your friends!!
TIP: Making your own minced garlic.
After you peel the garlic (or just buy peeled garlic), place it in a mini blender. Pulse a little to create minced garlic. Keep it refrigerated in a glass jar. Whenever you need it, it is in the jar instead of having to do all the work every time you cook. ;)
p.s. Happy Pi (3.14) Day!!!
Red, yellow, white onions add amazing fragrance and flavor to dishes. Usually, I go with red or yellow. Then I dice the onions. Heat (Medium Heat) up about a tablespoon (or two) of oil (olive or grapeseed) in a pan. Throw the diced onions in and stir with a wooden spoon. I read that you are supposed to cook with a wooden spoon and serve with a metal one. The reason you cook with the wooden spoon is to protect your pots and pans from scratches. It takes about five minutes.
After you have translucent diced onions, you can add garlic. Do not add garlic too early or else it will burn.
That should make many of your dishes more flavorful. ONIONS and GARLIC. Mmm...the house will smell wonderful!!
What I like to do is add other veggies too. In this photo, diced italian squash and mushrooms are in the onion-garlic mix. (Add bell peppers for more color and vitamin C. In this case, I already diced enough and decided to save the bell pepper for a dish the next day.)

I was making my pasta sauce chunkier. All I do after is pour the pasta sauce of my choice.

With the diced sauteed vegetables, not only could you make it part of your pasta sauce.. You can also add the mixture to an omelette, casserole, crepe, enchilada, mapo tofu, etc. The possibilities are endless.
ONIONS and GARLIC are your friends!!
TIP: Making your own minced garlic.
After you peel the garlic (or just buy peeled garlic), place it in a mini blender. Pulse a little to create minced garlic. Keep it refrigerated in a glass jar. Whenever you need it, it is in the jar instead of having to do all the work every time you cook. ;)
p.s. Happy Pi (3.14) Day!!!
Tuesday, March 6, 2012
Pictures from my Backyard...
It has been a warm summer in Southern California. Previously, I had removed tons of daffodil bulbs. They were everywhere. Planted some things in its place. In mid-January, I planted some tulips which usually are to be planted in late-nov or december but my mom gave them to me since her soil was too hard this winter. After a very short five weeks, these were the first of them to bloom...

A view of some rocks and decorations in my backyard.

For anyone who is curious about the status of my herbs that I tried planting from seed, here they are sprouting..

The area on the top left with the dirt was supposed to sprout chives. The basil and parsley sprouts are pictured above.
Here is another interesting tidbit.. Last year, I planted some tulips just anywhere since I just wanted to get the bulbs in the ground. They bloomed. Well, the area is pretty shady and we don't water it either. But this time around magically, the one tulip from last year became three!! Take a look..

Happy spring time!!! My favorite season...bright colors, more daylight, happiness all around... ;)
Don't forget that Daylight Savings comes early (about 5 weeks this time)...March 11, 2012 @2am. We spring forward this weekend. Woo-hoo!!
Monday, February 27, 2012
Plumbing: Both sides of kitchen sink aren't draining...
...what do I do?
I recommend doing searches on DIY fixes and watching videos to see what you can do to save yourself some money and the hassle of finding a plumber.
So, both sides of my kitchen sink weren't draining. Actually they would drain but very very very slowly. It occurred after I put some grapefruit down the garbage disposal. I read articles and forums on fixing the garbage disposal. Watched videos on how to unclog sinks and fix the disposal.
Pour a ton of baking soda and watched the fizzing effect of a chemistry experiment when I poured a half cup of vinegar down the drain. Cool, but didn't work.
Put Drano down the sink. Nothing happened. Literally poured $5 down the drain.
Ready for the fix??
The good ole' plunger!! Fill up your sink with a couple inches of water (3-4 inches). What you do is have another person block the other side of the sink with a towel. The plunge away!! That's it.
If you come across the problem of both sides of the kitchen sink have ultra-slow, little to none, draining. Don't call the plumber. Grab a plunger, towel, and a friend.
Thank me later!!
Wednesday, February 22, 2012
Tips on Being Resourceful and Saving $$ on Groceries
If you've noticed, I save old plastic containers (see Mint Buttercream Frosting post) that were used for cupcakes transportation. Other notable reusable items are glass jars after consuming the jams and sauces and bottles. Of course, I don't save EVERY container that comes my way or else I would have a huge cabinet of them!! I'm going to give you some of my top tips and ideas for reuse. The possibilities are endless...
Reuse:
1) Plastic containers that produce comes in. When you are washing your veggies/fruit, rinse the container as well especially when it is the size that fits cupcakes, cookies, etc.
2) Glass jars are highly useful for when you make your own viniagrettes/salad dressings. You do not need to go to the store to buy a whole bunch for $2-10.
3) Glass bottles. Repurposing drink bottles and wine bottles to use as vases adds the vintage look to your tables. Paint them or tie simple bows.
4) Egg cartons. While learning how to make pretty flowers for cake design with gum paste and fondant, I discovered that egg cartons were the perfect container for the flower creations. Letting them dry while not touching each other was important. Use them for art projects also.
Grocery Shopping Tips:
1) Look at the mailer ads. When you want to be frugal, you will start to get a feel of the prices of meat, vegetables, cheeses, milk, etc. Price vary from week to week.
2) Rain checks. When an item is out of stock for the day, you can have the grocery store write you a rain check! Most supermarkets give you 30 days to use them. Von's rain checks are good for 90 days. Just imagine -- you can buy at that weekly steal price for three months.
3) Fish. Usually fresh fish costs the most. Go to the frozen section. Some of the fresh fish that I have bought say, "Previously frozen" on them. *I know I haven't had a fish recipe yet but it is what I consume weekly.*
4) Dried versus Canned (Beans). Canned goods are fairly cheap but did you know that dried ones are even cheaper?
5) Buy in season. Fresh produce in season is much cheaper than importing fruits from other countries.
6) Be aware of which items have the same everyday price. We do not always have time to price compare. Personally when I don't have time to be aware of the cheapest ad for each item, I go to the places that have a regular price that is reasonable.
7) Vegetables are usually cheaper at Chinese and Korean Supermarkets.
8) My personal fave: Trader Joe's. I've shopped TJ's for over 20 years. Not many people can say that since most people only discovered TJ's in the past 10. Top3 picks for regular price? Milk, eggs, and bananas.
WARNING: Buying in Bulk.
Buying in bulk is a good tip too; however, be aware of the price per can/bottle. Take into account that if you don't end up using all of the product, that is money down the drain too. Contrary to popular belief, Costco/Sam's Club is not cheaper than Asian Supermarkets and regular weekly mailers. Paying for membership means that you have to save X amount of money first for you to get the real deal. I've watched people spend more than they wanted and not been able to use it all. If you have to toss it, that is like throwing away $$.
Definitely enough tips to get you thinking.. =)
Happy Shopping!!!
*Note: I have no idea how people shop when they don't know how to calculate things in their head. When I shop, I am constantly dividing, multiplying, and adding. These days some grocery stores have the price per ounce posted which is nice. I suppose people get ripped off and leave happy? Ignorance is bliss? =p
Reuse:
1) Plastic containers that produce comes in. When you are washing your veggies/fruit, rinse the container as well especially when it is the size that fits cupcakes, cookies, etc.
2) Glass jars are highly useful for when you make your own viniagrettes/salad dressings. You do not need to go to the store to buy a whole bunch for $2-10.
3) Glass bottles. Repurposing drink bottles and wine bottles to use as vases adds the vintage look to your tables. Paint them or tie simple bows.
4) Egg cartons. While learning how to make pretty flowers for cake design with gum paste and fondant, I discovered that egg cartons were the perfect container for the flower creations. Letting them dry while not touching each other was important. Use them for art projects also.
WHEN YOU DON'T REUSE, RECYCLE.
Grocery Shopping Tips:
1) Look at the mailer ads. When you want to be frugal, you will start to get a feel of the prices of meat, vegetables, cheeses, milk, etc. Price vary from week to week.
2) Rain checks. When an item is out of stock for the day, you can have the grocery store write you a rain check! Most supermarkets give you 30 days to use them. Von's rain checks are good for 90 days. Just imagine -- you can buy at that weekly steal price for three months.
3) Fish. Usually fresh fish costs the most. Go to the frozen section. Some of the fresh fish that I have bought say, "Previously frozen" on them. *I know I haven't had a fish recipe yet but it is what I consume weekly.*
4) Dried versus Canned (Beans). Canned goods are fairly cheap but did you know that dried ones are even cheaper?
5) Buy in season. Fresh produce in season is much cheaper than importing fruits from other countries.
6) Be aware of which items have the same everyday price. We do not always have time to price compare. Personally when I don't have time to be aware of the cheapest ad for each item, I go to the places that have a regular price that is reasonable.
7) Vegetables are usually cheaper at Chinese and Korean Supermarkets.
8) My personal fave: Trader Joe's. I've shopped TJ's for over 20 years. Not many people can say that since most people only discovered TJ's in the past 10. Top3 picks for regular price? Milk, eggs, and bananas.
WARNING: Buying in Bulk.
Buying in bulk is a good tip too; however, be aware of the price per can/bottle. Take into account that if you don't end up using all of the product, that is money down the drain too. Contrary to popular belief, Costco/Sam's Club is not cheaper than Asian Supermarkets and regular weekly mailers. Paying for membership means that you have to save X amount of money first for you to get the real deal. I've watched people spend more than they wanted and not been able to use it all. If you have to toss it, that is like throwing away $$.
Definitely enough tips to get you thinking.. =)
Happy Shopping!!!
*Note: I have no idea how people shop when they don't know how to calculate things in their head. When I shop, I am constantly dividing, multiplying, and adding. These days some grocery stores have the price per ounce posted which is nice. I suppose people get ripped off and leave happy? Ignorance is bliss? =p
Friday, February 17, 2012
Apple Squares
Last night, I was looking for something to eat but nothing really looked appetizing for a snack. So I decided to bake Apple Squares. Apple is one of my least favorite fruits *and I'm a teacher...go figure*; however, I love apples when they are baked!!
The most time-consuming part of baking apple squares has to be the peeling, coring, dicing of the apple. I am aware that the apple peeler exists but don't think I would actually use it since from time to time since I only need ONE apple. Besides, I have seen the demos at the stores; seems to me that there is a lot of apple wasted when you use those gadgets! Total time for me to prep/bake this from start to finish was about 40 minutes (bake time is 30 minutes). The recipe says, "Ready in 55 minutes" but I guess I'm fast? haha..
One of my favorite things about baking is the fragrant, sweet aroma in the kitchen. Mmm..

Enjoy!!! =)
p.s. I had apple squares for breakfast this morning.
Thursday, February 16, 2012
Quinoa!! Try it tonight!
In the last post, I made a quinoa meatloaf. I have a love affair with quinoa, my favorite grain!! This protein rich grain is my substitute when I want to switch up my brown rice. It's hearty with a fluffy texture similar to that of couscous. The simplest way to make quinoa is to use a rice cooker (You may also cook on the stove top).
Simple Quinoa (Healthier at half the sodium; most recipes call for 2 cups of broth)
Prep Time: 2 min Cook Time: 20 min
Ingredients:
1 cup quinoa (1/2 cup of dry quinoa yields 2 cups cooked quinoa)
1 cup chicken broth (or vegetable broth)
1 cup water
*Note: Quinoa can also be cooked with 2 cups of water but I like to cut sodium.
Directions:
Put all ingredients into the rice cooker. Press start. Then you have time to prep the rest of your meal.
When cooking brown rice, quinoa, or barley/bean grains, the ratio of water to grain is 2:1. *Places like Whole Foods don't do justice for grains like brown rice. If your only experience with brown rice is from Whole Foods (prepared foods section), you need to try it again when it is cooked correctly. They don't add enough liquid which causes it to be dry. I have written comments to them but I don't know if they took my advice.* For example, if you wanted to make 2 cups of quinoa, you would need 4 cups of liquid. The reason I mix water and chicken broth is because I am like to limit the sodium intake of my food. Halt the salt is very important. *Typically a can of chicken broth contains 40% of your daily value of sodium!!*
If you want to make your quinoa more interesting, you can chop 1/2 a cup of onions and 1/4 cup of pine nuts. In a medium saucepan, heat some olive oil. add chopped onions(I used red onions) and carmelize by stirring (about 5 minutes). Add the pine nuts to toast them. After the pine nuts are slightly toasted, put the cooked quinoa in the pan. Stir to mix.

Enjoy!!! =)
Tuesday, February 14, 2012
What's for Dinner, vaLINtine??
For quite a while, I have wanted to make meatloaf and pecan pie from scratch for my hubby. He has expressed love for the two food items. So today, valentine's dinner consisted of quinoa meatloaf, sauteed arugula/spinach, soycutash (frozen corn, bell peppers, soy beans from TJ's), mini pecan pie tarts.
Traditional meatloaf is made with breadcrumbs. Quinoa took the place of breadcrumbs in my meatloaf. What I loved most about this meatloaf was the subtle Sriracha sauce. Click for the recipe. It says that it serves 5, but it's more like 3. Or maybe we are pigs! Lol..
My mini pecan pie tarts did not look like the picture in the recipe. Perhaps I'll have better luck next time. Think I changed the recipe so much by halving it so it didn't come out like that. *When halving it, I was supposed to put 3 oz of cream cheese in; but since I didn't want to open a new package, I only put 2. Haha.* Nevertheless, they were delicious!! Asked hubby if he wanted to share with others. He replied, "That they were his."
Mine looked more like mini pecan pie muffins. Oh, but they were sooo divine! Next time, I will be making the full recipe.

Hope you had a great day with you and yours!!

*Note: vaLINtine refers to Jeremy Lin on the NY Knicks. For those of you living in a cave, he's come out of nowhere (Okay, really from Palo Alto...norcal baby!!). The only reason he has had a chance to start as a point guard is because there was no one else. He's led the team to six straight Knick wins. Tonight, he made the 3-ptr with 0.5 sec left. Read more here..
Sunday, February 12, 2012
Ham Sun-dried Tomato Strata
My favorite meal besides dessert is brunch!! When choosing recipes or tweaking them, I do much research before actually committing to one. Sometimes, I even change my mind ten minutes before I begin. My recipe winner this time was Martha Stewart's Strata with Sausage and Sun-dried Tomato. My version since I'm into healthier options was Ham Sun-dried Tomato Strata. By ham, in my world I am referring to heart healthy Canadian bacon.
Ham Sun-dried Tomato Strata
Prep Time: 40 min Cook Time: 1 hr 20 min
Ingredients:
6 oz Canadian bacon, diced
1/2 cup onion, diced
1/4 cup sun-dried tomatoes
2 Tbsp butter
6 large eggs
1 cup milk
6 slices of bread, cubed (I used a 15 grain bread with the crust.)
6 oz shredded skim mozarella
1/2 tsp sea salt
1/4 tsp fresh ground pepper
Directions:
In a large skillet over medium heat, melt the butter. Throw in the diced onions to carmelize them by stirring them for about five minutes. Add the Canadian bacon and sun-dried tomatoes to the onions. Remove from heat after two minutes. Be sure it's cool before you add it to the baking dish.
In a large bowl, whisk eggs, milk, salt, and freshly ground pepper. Butter an 8x8 square baking dish. Place about half of the cubed bread into the baking dish. Next add half of the ham-onion-tomato mixture. Add a layer of mozarella cheese. Layer the rest of the ingredients in that order 1) bread 2) ham-onion-tomato 3) cheese. *Similar to lasagna layering
Pour egg mixture over the layers. Refrigerate for at least an hour (but it's better to do it overnight).
When you are ready to bake, preheat the oven to 350F. Bake about 50 minutes.

This is what the cross section looks like.

The first bite was truly heavenly!! The one ingredient that made it so fragrant was the caramelized onions; however, the whole combo made the strata simply amazing. I've baked other brunch casseroles and stratas but this one was by far my favorite to date. Definitely going to keep this in mind whenever I make brunch.

Enjoy!!! ;)
Ham Sun-dried Tomato Strata
Prep Time: 40 min Cook Time: 1 hr 20 min
Ingredients:
6 oz Canadian bacon, diced
1/2 cup onion, diced
1/4 cup sun-dried tomatoes
2 Tbsp butter
6 large eggs
1 cup milk
6 slices of bread, cubed (I used a 15 grain bread with the crust.)
6 oz shredded skim mozarella
1/2 tsp sea salt
1/4 tsp fresh ground pepper
Directions:
In a large skillet over medium heat, melt the butter. Throw in the diced onions to carmelize them by stirring them for about five minutes. Add the Canadian bacon and sun-dried tomatoes to the onions. Remove from heat after two minutes. Be sure it's cool before you add it to the baking dish.
In a large bowl, whisk eggs, milk, salt, and freshly ground pepper. Butter an 8x8 square baking dish. Place about half of the cubed bread into the baking dish. Next add half of the ham-onion-tomato mixture. Add a layer of mozarella cheese. Layer the rest of the ingredients in that order 1) bread 2) ham-onion-tomato 3) cheese. *Similar to lasagna layering
Pour egg mixture over the layers. Refrigerate for at least an hour (but it's better to do it overnight).
When you are ready to bake, preheat the oven to 350F. Bake about 50 minutes.


The first bite was truly heavenly!! The one ingredient that made it so fragrant was the caramelized onions; however, the whole combo made the strata simply amazing. I've baked other brunch casseroles and stratas but this one was by far my favorite to date. Definitely going to keep this in mind whenever I make brunch.

Enjoy!!! ;)
Saturday, February 11, 2012
Chocolate Dipped Strawberries
Love it or hate it since it's extremely commercialized these days, Valentine's Day is the perfect excuse for sweets. The best thing is that strawberries are in season!! They are currently 2 (1 lb) for $3.

I am going to teach you how to make Chocolate Dipped Strawberries without a double boiler. Sure, it's cool when you have fancy smancy kitchen appliances, but you can use what you already have with the basics. All you need is a bowl and a little pot with a lid.

Double boiler:
Fill the little pot about 1/2 full of water. Bring to a boil. Then place the bowl on top of the pot. Note that the bowl needs to be big enough so that it doesn't fall into the pot. Ta-da!! You have a double broiler!!

Chocolate Dipped Strawberries
Prep Time: 40 min Cook Time: 10 min (Need two hours for the strawberries to completely harden)
Ingredients:
1 lb of strawberries
6 oz of chocolate (These are approximate since it depends on how many strawberries you want.)
sprinkles/nuts are optional (for decorating)
Directions:
Wash your strawberries. I like to put it in a huge bowl with water for at least 10 minutes. Then strain with a colander. It is very important that you work with DRY strawberries. To achieve this, grab a paper towel (on a flat surface) and start lining up the strawberries on top.

Usually, I wait for it to naturally dry for a bit. Then I pat it dry with the paper towel. (That is the reason I estimated prep time to be 40 minutes - for washing and drying.)
On to the double boiler that I created... When the water begins to boil, put chocolate (chunks or chips) into the bowl. For the chocolate to heat evenly, top the pot with the lid. If you see the chocolate begin to melt but think it needs more "help", grab a small spoon to stir.

Before you start dipping, make sure you create a flat surface with parchment paper. I used a 13x9 inch pan since you need the strawberries to sit flat to harden.
When the chocolate is melted, carefully dip each strawberry. Don't worry if they aren't so pretty. The trick to evening it out is to use your little spoon to smooth/spread the chocolate. Once you have the strawberry looking as desirably chocolate as you wish, place it on the parchment paper.
Afterwards, you can decorate the dipped strawberries (or leave it as is). The easiest way to decorate is to simply dip them into sprinkles/nuts or drizzle some melted chocolate (of another color, white) in a zigzag. This time, I decided to make letters out of my sprinkles. Did not even realize I was playing tic tac toe until the end. Haha!!

Put the whole pan, plate (or I have even placed parchment paper on a cutting board since it was a flat surface) into the refrigerator to harden.
Happy Valentine's Day!!

Enjoy these with your sweetie!!! ;)
*Note: Chocolate Dipped Strawberries are a make-the-day-before treat. I keep them in the refrigerator to harden overnight, not just for two hours.
Subscribe to:
Posts (Atom)