This morning, we were eating breakfast. The basket of strawberries were a bit sour. Told hubby that we did not need to keep eating them. What to do with sour strawberries?
That's when I whipped out my mini smoothie maker. It's been a while since I've used it.
It's about the same size as the magic bullet. I love it since it doesn't take up much space and it's super easy to clean.
Simple Strawberry Smoothie
Prep Time: 10 min
Ingredients:
1 cup strawberries (3/4 cup to 1 cup)
1/2 cup milk
1/2 cup crushed ice (unless you have a heavy duty blender in which case it doesn't matter)
2 Tbsp honey
Directions:
Remove the stems of the strawberries. Placed the strawberries in. Add the milk. Pulse.
Add crushed ice and pulse it. If the consistency of your smoothie is too watery, add more crushed ice and pulse again.
Lastly, add the honey (or sugar). I like to do one tablespoon at a time. Sweetness is really to taste. You can always put more but you can't take out the sweetness if you go overboard.
ENJOY!!!
*Notes:
1) If you want a thicker smoothie, you can add a half cup of yogurt or ice cream.
2) You can make substitute the strawberries with whatever fruit you have on hand. Make a banana smoothie or mango smoothie or _____.
3) I highly recommend that you buy a mini blender. They are so useful!! You can also mince garlic quickly by pulsing it too. Easy clean up is huge plus!!
Healthy meets Delicious.. They fall in LOVE!! ;) *Click on the pictures to enlarge.
Showing posts with label Snack. Show all posts
Sunday, September 8, 2013
Wednesday, August 7, 2013
Dill Egg Salad (No Mayo)
I haven't written any recipes all summer!! So today, I will share with you an egg salad recipe. Usually, when I think of egg salad, the two things that come to mind are cholesterol and fat. With all those eggs and all that mayo, it can't be good to have too many of them.
Started to sift through recipes for healthy substitutions... My egg salad was mayo-less.
This is a great recipe for picnics, tea parties, lunch/dinner.
Dill Egg Salad
Cook Time: 10 minutes Prep Time: 20 minutes
Ingredients:
6 eggs
3 tbsp greek yogurt
1/2 - 3/4 tsp coarse sea salt (this is to your liking)
1/2 tsp black pepper
2 tbsp dijon mustard
Directions:
Bring a pot of water to boil for the eggs. Generally, it takes about 9 minutes to get a hard boiled egg. I like to boil it longer just in case. Once that is done, strain the hot water. add cold water to the eggs. You don't want to burn your fingers while trying to peel them. Gently hit the hard boiled eggs against the side of the pot. Peel off the egg shells.
To make it less cholesterol, only use 1-2 egg yolks. Most people will want two to mash with the egg whites, but I am fine with just keeping one egg yolk. Discard the other 4 or 5 egg yolks. They stay intact, so it's easy to do.
Chop the egg whites (Or you can pulse it a couple times in the food processor. I don't like to do that since I have to wash the food processor.). In a bowl, mix the chopped egg whites with the egg yolk(s). Mix well so that the egg yolk is more even distributed.
In a separate bowl, add the greek yogurt, dill, and salt. I tasted the mixture, it still tasted like yogurt. What transformed it into a salty mixture was the mustard. Add mustard and black pepper. Then taste and see if you want more salt, pepper, etc.
Pour the yogurt mixture into the bowl with the chopped eggs. Mix with a spoon. That's it!
I like to put the egg salad on wheat bread. Adding arugula would be a nice touch but I didn't have any on hand. I chopped some green beans to give my egg salad a crunchier texture.
You can get creative by making shaped tea sandwiches, open faced sandwiches, pita pockets, etc.
Enjoy!!
Started to sift through recipes for healthy substitutions... My egg salad was mayo-less.
This is a great recipe for picnics, tea parties, lunch/dinner.
Dill Egg Salad
Cook Time: 10 minutes Prep Time: 20 minutes
Ingredients:
6 eggs
3 tbsp greek yogurt
1/2 - 3/4 tsp coarse sea salt (this is to your liking)
1/2 tsp black pepper
2 tbsp dijon mustard
Directions:
Bring a pot of water to boil for the eggs. Generally, it takes about 9 minutes to get a hard boiled egg. I like to boil it longer just in case. Once that is done, strain the hot water. add cold water to the eggs. You don't want to burn your fingers while trying to peel them. Gently hit the hard boiled eggs against the side of the pot. Peel off the egg shells.
To make it less cholesterol, only use 1-2 egg yolks. Most people will want two to mash with the egg whites, but I am fine with just keeping one egg yolk. Discard the other 4 or 5 egg yolks. They stay intact, so it's easy to do.
Chop the egg whites (Or you can pulse it a couple times in the food processor. I don't like to do that since I have to wash the food processor.). In a bowl, mix the chopped egg whites with the egg yolk(s). Mix well so that the egg yolk is more even distributed.
In a separate bowl, add the greek yogurt, dill, and salt. I tasted the mixture, it still tasted like yogurt. What transformed it into a salty mixture was the mustard. Add mustard and black pepper. Then taste and see if you want more salt, pepper, etc.
Pour the yogurt mixture into the bowl with the chopped eggs. Mix with a spoon. That's it!
I like to put the egg salad on wheat bread. Adding arugula would be a nice touch but I didn't have any on hand. I chopped some green beans to give my egg salad a crunchier texture.
You can get creative by making shaped tea sandwiches, open faced sandwiches, pita pockets, etc.
Enjoy!!
Thursday, September 20, 2012
Macadamia Nut
Macadamia nuts grow on trees. They have two hard shells. Squirrels must have sharp teeth because it took me a while to open one. This was the first time that picked them off the trees.
When you pick the nut from the tree, it has a hard, green shell. After a couple days, the green shell cracks open...
When the green shell opens, it is fairly easily to get to the inside nut. You have a brown shell that is more difficult to crack that the outer one.
I had to clamp the nut down so that I could hammer the inside shell open.
After several hits, the brown shell finally feels the impact.
Here is a close up of the macadamia nut:
Out of the shell!!!
All that time and effort for one nut!! I go outside to crack one nut. After a minute or two, I attempt to crack another nut. Never timed how long it takes to unshell five nuts. They have machines that can crack hundreds of nuts within the amount of time that I cracked a few.
Just thought I'd share!!
When you pick the nut from the tree, it has a hard, green shell. After a couple days, the green shell cracks open...
When the green shell opens, it is fairly easily to get to the inside nut. You have a brown shell that is more difficult to crack that the outer one.
I had to clamp the nut down so that I could hammer the inside shell open.
After several hits, the brown shell finally feels the impact.
Here is a close up of the macadamia nut:
Out of the shell!!!
All that time and effort for one nut!! I go outside to crack one nut. After a minute or two, I attempt to crack another nut. Never timed how long it takes to unshell five nuts. They have machines that can crack hundreds of nuts within the amount of time that I cracked a few.
Just thought I'd share!!
Tuesday, September 18, 2012
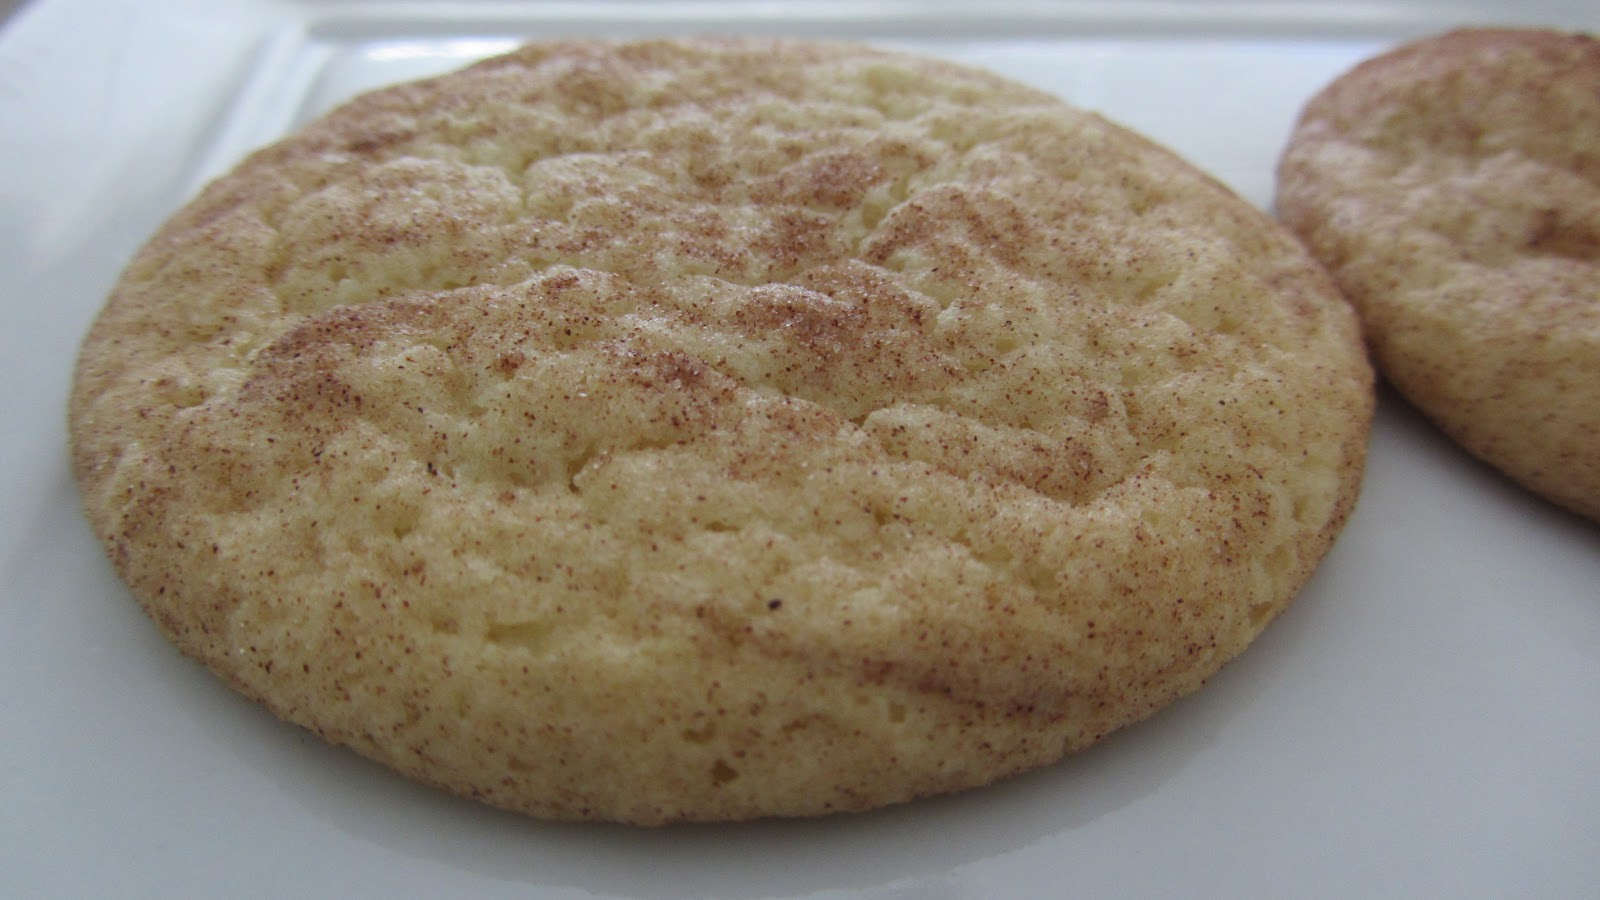
Snickerdoodles!!
*Just dessert. Not a modified healthy version. heheh.*
Many recipes use cream of tartar. It is quite expensive at the store. A tip that a grocery store employee gave me was to use cornstarch as a substitute since the texture/consistency was the same. I decided to do without it altogether. I went with good ole Martha!
Martha Stewart’s Snickerdoodles
makes about 1 1/2 dozen
2 3/4 cups all-purpose flour
2 tsp baking powder
1/2 tsp coarse salt
1 cups (2 sticks) unsalted butter, room temperature
1 1/2 cups sugar
2 large eggs
...and...
2 tbsp sugar
2 tsp ground cinnamon
2 tsp baking powder
1/2 tsp coarse salt
1 cups (2 sticks) unsalted butter, room temperature
1 1/2 cups sugar
2 large eggs
...and...
2 tbsp sugar
2 tsp ground cinnamon
Preheat oven to 350F. Sift together flour, baking powder and salt into a bowl. Put butter and 1 1/2 cups sugar in the bowl of an electric mixer fitted with the paddle attachment. Mix on medium speed until pale and fluffy, about 3 minutes. Mix in eggs. Reduce speed to low; gradually mix in flour mixture.
Stir together cinnamon and remaining 2 tablespoons sugar in a small bowl. Shape dough into 20 (1 3/4-inch) balls; roll in cinnamon sugar. Space 3 inches apart on baking sheets lined with parchment paper.
Bake cookies, rotating sheets halfway through, until edges are golden, 12 to 15 minutes. Let cool on sheets on wire racks. Cookies can be stored between layers of parchment in airtight containers at room temperature up to 3 days.
I used an ice cream scooper to make the balls of dough even. My cookies were all about the same size. Lined my pans with silpat (non-stick silicone). I love using silpat since you can remove them from the pan. It leads to quicker cooling time.
These snickerdoodles were perfect...chewy cookies that were not too sweet.
Enjoy!!!
Thursday, August 30, 2012
Light & Healthy Stuffed Mushrooms
I have made amazing stuffed mushrooms before. It is really quite easy. I don't remember exactly what I used last time since each time it depends on what is in my fridge and pantry.
This time, I was thinking about how I could make a version that was lighter and healthier. Many recipes call for cream cheese. After sifting through many recipes while thinking about what I had on hand, I concocted a recipe. I'll have to say that not only was it healthy but it was the best tasting!!
Light & Healthy Stuffed Mushrooms
Ingredients:
6 Large Mushrooms
1/2 cup shredded cheese
1 cup chopped spinach
some walnuts (in pieces)
1 small onion (1/2 large onion)
dice some ham
salt, pepper, paprika
some crackers
Directions:
Preheat the oven to 350F. Clean and hollow out the large mushrooms. Set aside. (Note: When I hollow out the large mushrooms, I actually dice that part of the mushroom to put into the stuffing mixture. That way you don't waste it.)
In a skillet, heat the olive oil on medium heat. Add chopped onions. Saute for about four to five minutes. When onions soften, add chopped spinach. Stir well. Add shredded cheese (American, Swiss, or cheese of your choice), some ham and crushed walnuts. Add seasonings (salt, pepper, paprika) to taste.
Remove from heat. Spoon the mixture into the mushroom caps.
Put some crackers in a plastic bag. Crush it so that you create breadcrumbs. Top the stuffed mushrooms with the crushed crackers.
Place on a baking sheet. Bake for 20 minutes.
These stuffed mushrooms are simply delicious. It won't leave you feeling heavy like most restaurant stuffed mushrooms.
ENJOY!!! =D
This time, I was thinking about how I could make a version that was lighter and healthier. Many recipes call for cream cheese. After sifting through many recipes while thinking about what I had on hand, I concocted a recipe. I'll have to say that not only was it healthy but it was the best tasting!!
Light & Healthy Stuffed Mushrooms
Ingredients:
6 Large Mushrooms
1/2 cup shredded cheese
1 cup chopped spinach
some walnuts (in pieces)
1 small onion (1/2 large onion)
dice some ham
salt, pepper, paprika
some crackers
Directions:
Preheat the oven to 350F. Clean and hollow out the large mushrooms. Set aside. (Note: When I hollow out the large mushrooms, I actually dice that part of the mushroom to put into the stuffing mixture. That way you don't waste it.)
In a skillet, heat the olive oil on medium heat. Add chopped onions. Saute for about four to five minutes. When onions soften, add chopped spinach. Stir well. Add shredded cheese (American, Swiss, or cheese of your choice), some ham and crushed walnuts. Add seasonings (salt, pepper, paprika) to taste.
Remove from heat. Spoon the mixture into the mushroom caps.
Put some crackers in a plastic bag. Crush it so that you create breadcrumbs. Top the stuffed mushrooms with the crushed crackers.
Place on a baking sheet. Bake for 20 minutes.
These stuffed mushrooms are simply delicious. It won't leave you feeling heavy like most restaurant stuffed mushrooms.
ENJOY!!! =D
Labels:
Appetizers,
Easy,
Italian,
Recipe,
Snack
Friday, February 17, 2012
Apple Squares
Last night, I was looking for something to eat but nothing really looked appetizing for a snack. So I decided to bake Apple Squares. Apple is one of my least favorite fruits *and I'm a teacher...go figure*; however, I love apples when they are baked!!
The most time-consuming part of baking apple squares has to be the peeling, coring, dicing of the apple. I am aware that the apple peeler exists but don't think I would actually use it since from time to time since I only need ONE apple. Besides, I have seen the demos at the stores; seems to me that there is a lot of apple wasted when you use those gadgets! Total time for me to prep/bake this from start to finish was about 40 minutes (bake time is 30 minutes). The recipe says, "Ready in 55 minutes" but I guess I'm fast? haha..
One of my favorite things about baking is the fragrant, sweet aroma in the kitchen. Mmm..
Enjoy!!! =)
p.s. I had apple squares for breakfast this morning.
The most time-consuming part of baking apple squares has to be the peeling, coring, dicing of the apple. I am aware that the apple peeler exists but don't think I would actually use it since from time to time since I only need ONE apple. Besides, I have seen the demos at the stores; seems to me that there is a lot of apple wasted when you use those gadgets! Total time for me to prep/bake this from start to finish was about 40 minutes (bake time is 30 minutes). The recipe says, "Ready in 55 minutes" but I guess I'm fast? haha..
One of my favorite things about baking is the fragrant, sweet aroma in the kitchen. Mmm..
Enjoy!!! =)
p.s. I had apple squares for breakfast this morning.
Wednesday, January 18, 2012
Grilled Cheese
Ages ago back in college during my freshman year, one of my floormates taught me how to make a grilled cheese sandwich. Until then I did not even think about how I had never actually consumed one. My discovery of this delicious, fast, and cheap meal is still one of the staples in my kitchen. Simple grilled cheese sandwich consists of two slices of bread, a slice of cheese, and some butter.
Over the years, my grilled cheese sandwich has evolved but it is still simple. My version of the the classic tastes like the crunchy cheese bread that I used to eat as a kid at Sizzler’s Restaurants.
Parmesan Grilled Cheese Sandwich
Prep Time: 5 minutes Cook Time: 6 minutes
Ingredients:
2 Slices of Bread (I prefer Wheat)
1 Slice of Cheese (I used Jalapeno Pepper Jack Cheese)
Some Butter
Parmesan Cheese (Grated)
Directions:
Lightly butter one side of each slice of bread. Sprinkle parmesan cheese onto the buttered bread using your fingers to gently pat the parmesan cheese to make sure it sticks to the bread. Assemble the sandwich by placing a slice of the bread buttered side down. Continue by placing the cheese on top. Then put the slice of bread plain side down. The buttered side of the slice of bread should be on the outside.
Put a nonstick frying pan on the stove. Place the sandwich in the pan on low to medium heat. After about three minutes, a crispy layer should form. Flip the sandwich so that the other buttered side is down.
Tip:
If you have a panini press or a George Foreman Grill, you can substitute the pan for the press. Once you press the sandwich between the two grill plates, both buttered sides of bread grill at the same time. This will save you half the grilling time.
ENJOY!!! =)
Subscribe to:
Posts (Atom)