This is the first dessert I made in the pressure cooker. Basically, you make rice. Then stir the other ingredients using the "Saute" mode. Easy peasy.
Rice Pudding
Prep Time: 5 minutes Pressure Cook Time: 4 minutes
Additional Cooking: 3 minutes
Ingredients:
1 cup Arborio rice
1.5 cups water
1/4 tsp salt
2 cups milk
1 tsp cinnamon
1/4 cup sugar
2 eggs
1/2 tsp vanilla extract
1/2 cup raisins
Directions:
Cook the rice by putting the Arborio rice, water, salt in the inner pot. Pressure cook on Manual mode high pressure for 4 minutes.
QR (quick release pressure). Stir in milk, cinnamon, sugar.
Using "Saute" button, stir in beaten eggs with vanilla extract. Keep stirring until everything is incorporated. Press cancel. Mix in raisins.
Rice pudding is served warm or cold. Your choice!!
Enjoy!!
Showing posts with label Dessert. Show all posts
Showing posts with label Dessert. Show all posts
Friday, April 28, 2017

Saturday, May 24, 2014
Mini Apricot Pie (Filling)
Mini Pies! Filling is easy to make. I usually buy premade crust. So all you have to do is fill them and bake. You can use any fruit actually. Add the desired amount of sugar and cornstarch. Read from bakers about the correct amount but it ends up being to your liking. Some like them sweeter, some don't. Some like more liquid (or thicker liquid), others want more fruit.
Filling for Apricot Pie
Ingredients:
Prep Time: 10 min Bake Time: 30 min
Serving Size: 6 mini pies
1 lb apricot (fresh apricots sliced)
1/4 cup sugar
1 1/2 tbsp cornstarch
a dash of salt (little less than 1/8 tsp)
Directions:
Mix the apricot, sugar, cornstarch, and a dash of salt. Fill your mini pies evenly.
Bake at 375F for 30 minutes.

*Note: Apricot pie is a bit tart. If you want, you could add more than 1/4 cup of sugar.
*Note: I did much reading to see how to make a pie less messy, not too watery. Read debates about using cornstarch vs flour vs minute tapioca. Finally decided to use cornstarch (I don't like cornstarch but flour makes the final product grainy white).
Enjoy!!
Filling for Apricot Pie
Ingredients:
Prep Time: 10 min Bake Time: 30 min
Serving Size: 6 mini pies
1 lb apricot (fresh apricots sliced)
1/4 cup sugar
1 1/2 tbsp cornstarch
a dash of salt (little less than 1/8 tsp)
Directions:
Mix the apricot, sugar, cornstarch, and a dash of salt. Fill your mini pies evenly.
Bake at 375F for 30 minutes.
*Note: Apricot pie is a bit tart. If you want, you could add more than 1/4 cup of sugar.
*Note: I did much reading to see how to make a pie less messy, not too watery. Read debates about using cornstarch vs flour vs minute tapioca. Finally decided to use cornstarch (I don't like cornstarch but flour makes the final product grainy white).
Enjoy!!
Sunday, March 23, 2014
Party: Minnie Mouse Oreos (or Mickey Mouse)
I was helping my friend with making Minnie Mouse oreo cookies for her daughter's birthday. They were super cute. Need to share with the world.
There are many more examples all over the internet with dipping the oreo, putting more embellishments, etc. You can put them on a stick and do a flower pot of mouse ears. We did simple ones.
Minnie (or Mickey) Mouse Oreo Cookies
Prep Time: Depends on how many you are making
Ingredients:
Oreo Cookies
Mini Oreos (for the mouse ears)
frosting (any kind since it's just a little for 'glue')
toothpicks
You open the oreo. Remove some frosting so that the ears fit on both sides. After placing the ears in, sandwich back the oreo. That's it.
For embellishment, we used Wilton's Big Hearts to create a bow. Stick the hearts on with the frosting using the toothpick. Done!

Here's another fun way to decorate. I made pink chocolate bows with Wilton Candy Melt in the light pink color. Stuck these with frosting too.


There are many more examples all over the internet with dipping the oreo, putting more embellishments, etc. You can put them on a stick and do a flower pot of mouse ears. We did simple ones.
Minnie (or Mickey) Mouse Oreo Cookies
Prep Time: Depends on how many you are making
Ingredients:
Oreo Cookies
Mini Oreos (for the mouse ears)
frosting (any kind since it's just a little for 'glue')
toothpicks
You open the oreo. Remove some frosting so that the ears fit on both sides. After placing the ears in, sandwich back the oreo. That's it.
For embellishment, we used Wilton's Big Hearts to create a bow. Stick the hearts on with the frosting using the toothpick. Done!
Here's another fun way to decorate. I made pink chocolate bows with Wilton Candy Melt in the light pink color. Stuck these with frosting too.
You can also have Mickey and Minnie.
Be creative!!
Tuesday, February 11, 2014
Espresso Bourbon Chocolate Brownies with Pecans
Sweet Cravings!!!
It's time to try a new recipe just in time for Valentine's Day!!
I LOVE BROWNIES.
Last night, I was looking at many brownie photos. But I didn't decided to bake until I saw this one from Lemon&Anchovies.
Coffee with Whiskey and Chocolate and Pecans??
...my HUBBY'S HEAVEN!!!

Espresso Bourbon Chocolate Brownies with Pecans
Prep Time: 15 min Bake Time: 30 minutes
Ingredients:
1/2 cup (or 3 oz) chocolate chunks (This will be melted with the butter)
1/2 cup butter (1 stick)
3/4 cup sugar
2 eggs
1 tsp vanilla extract
3/4 cup flour
1/2 tsp baking soda
1/4 cup bourbon (any Whiskey)
2 tbsp instant coffee
1/2 cup pecans
1/4 cup chocolate chips
Directions:
Preheat oven to 350F.
In a double boiler (Create yours by getting a pot with water with a bowl on top. Make sure the water does not touch the bottom of the bowl.), melt butter and chocolate. Remove from heat to transfer to a mixing bowl.
(In a small bowl, stir the whiskey with the instant coffee.)
Add the sugar into the mix. Beat eggs one at a time. Add vanilla.
Now pour the whiskey-coffee mixture.
In a separate bowl, mix flour and baking soda.
Pour the flour mixture into the same bowl as the wet ingredients. Once everything is incorporated, stir in pecans and chocolate chips.
Use cooking spray or foil in your 8x8 pan. Pour the batter in. Bake for 30 minutes.
My hubby LOVED it. First you taste chocolate with the aroma of coffee. Then you are hit with the alcohol.
WOW. This one's a keeper -- like my hubby!!!
Happy Valentine's Week!!
It's time to try a new recipe just in time for Valentine's Day!!
I LOVE BROWNIES.
Last night, I was looking at many brownie photos. But I didn't decided to bake until I saw this one from Lemon&Anchovies.
Coffee with Whiskey and Chocolate and Pecans??
...my HUBBY'S HEAVEN!!!
Espresso Bourbon Chocolate Brownies with Pecans
Prep Time: 15 min Bake Time: 30 minutes
Ingredients:
1/2 cup (or 3 oz) chocolate chunks (This will be melted with the butter)
1/2 cup butter (1 stick)
3/4 cup sugar
2 eggs
1 tsp vanilla extract
3/4 cup flour
1/2 tsp baking soda
1/4 cup bourbon (any Whiskey)
2 tbsp instant coffee
1/2 cup pecans
1/4 cup chocolate chips
Directions:
Preheat oven to 350F.
In a double boiler (Create yours by getting a pot with water with a bowl on top. Make sure the water does not touch the bottom of the bowl.), melt butter and chocolate. Remove from heat to transfer to a mixing bowl.
(In a small bowl, stir the whiskey with the instant coffee.)
Add the sugar into the mix. Beat eggs one at a time. Add vanilla.
Now pour the whiskey-coffee mixture.
In a separate bowl, mix flour and baking soda.
Pour the flour mixture into the same bowl as the wet ingredients. Once everything is incorporated, stir in pecans and chocolate chips.
Use cooking spray or foil in your 8x8 pan. Pour the batter in. Bake for 30 minutes.
My hubby LOVED it. First you taste chocolate with the aroma of coffee. Then you are hit with the alcohol.
WOW. This one's a keeper -- like my hubby!!!
Happy Valentine's Week!!
Monday, February 3, 2014
Oatmeal _____ Chip Bars
I don't make cookies often. I prefer to make bars. The difference??
It's less work!!

The batter is the same but I don't have to roll the dough into balls or use a scoop for cookies. Don't have to worry about the spacing of the cookies in the oven while baking since it spreads. Just pour the entire batter into a pan. Then it's ready to bake.
This is my favorite oatmeal bar recipe. Baked it with cinnamon chips and another batch with chocolate chips.
Oatmeal Chocolate Chip Bars
Prep Time: 10 min Bake Time: 25-30 min
Ingredients:
1 cup butter (or 2 sticks)
1 cup brown sugar
1/3 cup granulated sugar
2 eggs
1 1/2 tsp vanilla extract
1 1/2 cups flour
1 tsp baking soda
2 1/2 cups oatmeal
1 2/3 cup chocolate chips
1/2 cup walnuts, optional
(3/4 cup raisins, optional)
Directions:
With a mixer, cream butter and sugars. Then beat in the eggs (one at a time) and vanilla.
In a separate bowl, add flour and baking soda. Stir with a spoon until the baking soda is incorporated into the flour.
Add half the dry ingredients (flour mixture) to the first bowl. Beat with mixer. Dump the other half in using mixer.
Now that the mixer part is done, add oatmeal, chocolate chips (or any flavored chips you desire), and walnuts. Stir with a spoon, fork, etc.
Pour the entire mixture into a 9x13 pan. Smooth out the chunky mixture with a spoon. Bake for 25-30 min. I usually check it at 28 min.

Let the oatmeal bars completely cool; Cut into squares/rectangles. But I put some on top of ice cream for hubby while it was warm.
With cinnamon chips...

With chocolate chips...

Enjoy!!
It's less work!!
The batter is the same but I don't have to roll the dough into balls or use a scoop for cookies. Don't have to worry about the spacing of the cookies in the oven while baking since it spreads. Just pour the entire batter into a pan. Then it's ready to bake.
This is my favorite oatmeal bar recipe. Baked it with cinnamon chips and another batch with chocolate chips.
Oatmeal Chocolate Chip Bars
Prep Time: 10 min Bake Time: 25-30 min
Ingredients:
1 cup butter (or 2 sticks)
1 cup brown sugar
1/3 cup granulated sugar
2 eggs
1 1/2 tsp vanilla extract
1 1/2 cups flour
1 tsp baking soda
2 1/2 cups oatmeal
1 2/3 cup chocolate chips
1/2 cup walnuts, optional
(3/4 cup raisins, optional)
Directions:
With a mixer, cream butter and sugars. Then beat in the eggs (one at a time) and vanilla.
In a separate bowl, add flour and baking soda. Stir with a spoon until the baking soda is incorporated into the flour.
Add half the dry ingredients (flour mixture) to the first bowl. Beat with mixer. Dump the other half in using mixer.
Now that the mixer part is done, add oatmeal, chocolate chips (or any flavored chips you desire), and walnuts. Stir with a spoon, fork, etc.
Pour the entire mixture into a 9x13 pan. Smooth out the chunky mixture with a spoon. Bake for 25-30 min. I usually check it at 28 min.
Let the oatmeal bars completely cool; Cut into squares/rectangles. But I put some on top of ice cream for hubby while it was warm.
With cinnamon chips...
With chocolate chips...
Enjoy!!
Wednesday, December 18, 2013
Easy Truffles
The holidays are a time to make sweets!!
Who doesn't want homemade sweets made with love?
After sifting through many many truffles recipes, I decided to keep it simple. Didn't really want to buy heavy whipping cream and not use it all. Usually when I buy ingredients, I think of multiple recipes to use them in so that I am not throwing away a quarter of the whipping cream. That's why I finally settled on the recipe with cream cheese instead. One package open, all of it in...no waste!
Easy Truffles
Prep Time: 2 hr
Ingredients:
1 (8 oz) package cream cheese
3 cups confectioners sugar (a.k.a. powdered sugar)
3 cups chocolate chips (or pastilles or bar)
1.5 tsp vanilla extract
Directions:
In a big bowl, beat cream cheese until smooth. Gradually beat in confectioners sugar a third at a time until well blended.
*************************** MELTING CHOCOLATE ********************************
For melting the chocolate, you can either do this in the microwave or use the double boiler method. If you choose to melt the chocolate in the microwave, do it for one minute. Take it out and stir with a spoon. Then microwave it for another minute. Stir with a spoon. Decrease the increments to 30 seconds so that you don't burn the chocolate. When all of the chocolate is melted, you are ready to use it.
If you wish to do the double boiler method but don't have one, you can easily create it by putting some water at the bottom of a pot. Place a bowl on top -- one that fits snugly. Make sure the water doesn't touch the bowl as it boils. This is key.
*************************** END MELTING CHOCOLATE ***************************
Stir the melted chocolate into the cream cheese-sugar mixture until well incorporated.
I like to divide the truffle mixture into two bowls. That way you can have two different flavorings.
If you do divide it into two halves, add 1 tsp extract of your choice for flavoring. I used rum. You can do vanilla, orange, almond, etc.
Place the mixtures in the fridge for cooling for about an hour.
Shaping the balls:
You can use a spoon and roll the truffle in your hand...OR to make it easier, use a mini ice cream scoop, 1 inch scoop, to have uniform round truffles. After you have the round truffles, you can roll them in whatever toppings you wish. I just rolled mine in cocoa.

Other ideas: The possibilities are endless!!
powdered sugar
chopped nuts
sprinkles
These make great gifts for your family, friends, or coworkers. Maybe you would rather keep them for yourself! heheh. But it's better to share or else you will have more holiday weight to shake off at the beginning of the year.

Happy Holidays!!!
Note: You don't have to stick to dark chocolate. Feel free to melt white chocolate or milk chocolate if you know people who prefer those instead.
Who doesn't want homemade sweets made with love?
After sifting through many many truffles recipes, I decided to keep it simple. Didn't really want to buy heavy whipping cream and not use it all. Usually when I buy ingredients, I think of multiple recipes to use them in so that I am not throwing away a quarter of the whipping cream. That's why I finally settled on the recipe with cream cheese instead. One package open, all of it in...no waste!
Easy Truffles
Prep Time: 2 hr
Ingredients:
1 (8 oz) package cream cheese
3 cups confectioners sugar (a.k.a. powdered sugar)
3 cups chocolate chips (or pastilles or bar)
1.5 tsp vanilla extract
Directions:
In a big bowl, beat cream cheese until smooth. Gradually beat in confectioners sugar a third at a time until well blended.
*************************** MELTING CHOCOLATE ********************************
For melting the chocolate, you can either do this in the microwave or use the double boiler method. If you choose to melt the chocolate in the microwave, do it for one minute. Take it out and stir with a spoon. Then microwave it for another minute. Stir with a spoon. Decrease the increments to 30 seconds so that you don't burn the chocolate. When all of the chocolate is melted, you are ready to use it.
If you wish to do the double boiler method but don't have one, you can easily create it by putting some water at the bottom of a pot. Place a bowl on top -- one that fits snugly. Make sure the water doesn't touch the bowl as it boils. This is key.
*************************** END MELTING CHOCOLATE ***************************
Stir the melted chocolate into the cream cheese-sugar mixture until well incorporated.
I like to divide the truffle mixture into two bowls. That way you can have two different flavorings.
If you do divide it into two halves, add 1 tsp extract of your choice for flavoring. I used rum. You can do vanilla, orange, almond, etc.
Place the mixtures in the fridge for cooling for about an hour.
Shaping the balls:
You can use a spoon and roll the truffle in your hand...OR to make it easier, use a mini ice cream scoop, 1 inch scoop, to have uniform round truffles. After you have the round truffles, you can roll them in whatever toppings you wish. I just rolled mine in cocoa.

Other ideas: The possibilities are endless!!
powdered sugar
chopped nuts
sprinkles
These make great gifts for your family, friends, or coworkers. Maybe you would rather keep them for yourself! heheh. But it's better to share or else you will have more holiday weight to shake off at the beginning of the year.

Happy Holidays!!!
Note: You don't have to stick to dark chocolate. Feel free to melt white chocolate or milk chocolate if you know people who prefer those instead.
Tuesday, September 18, 2012
Snickerdoodles!!
*Just dessert. Not a modified healthy version. heheh.*
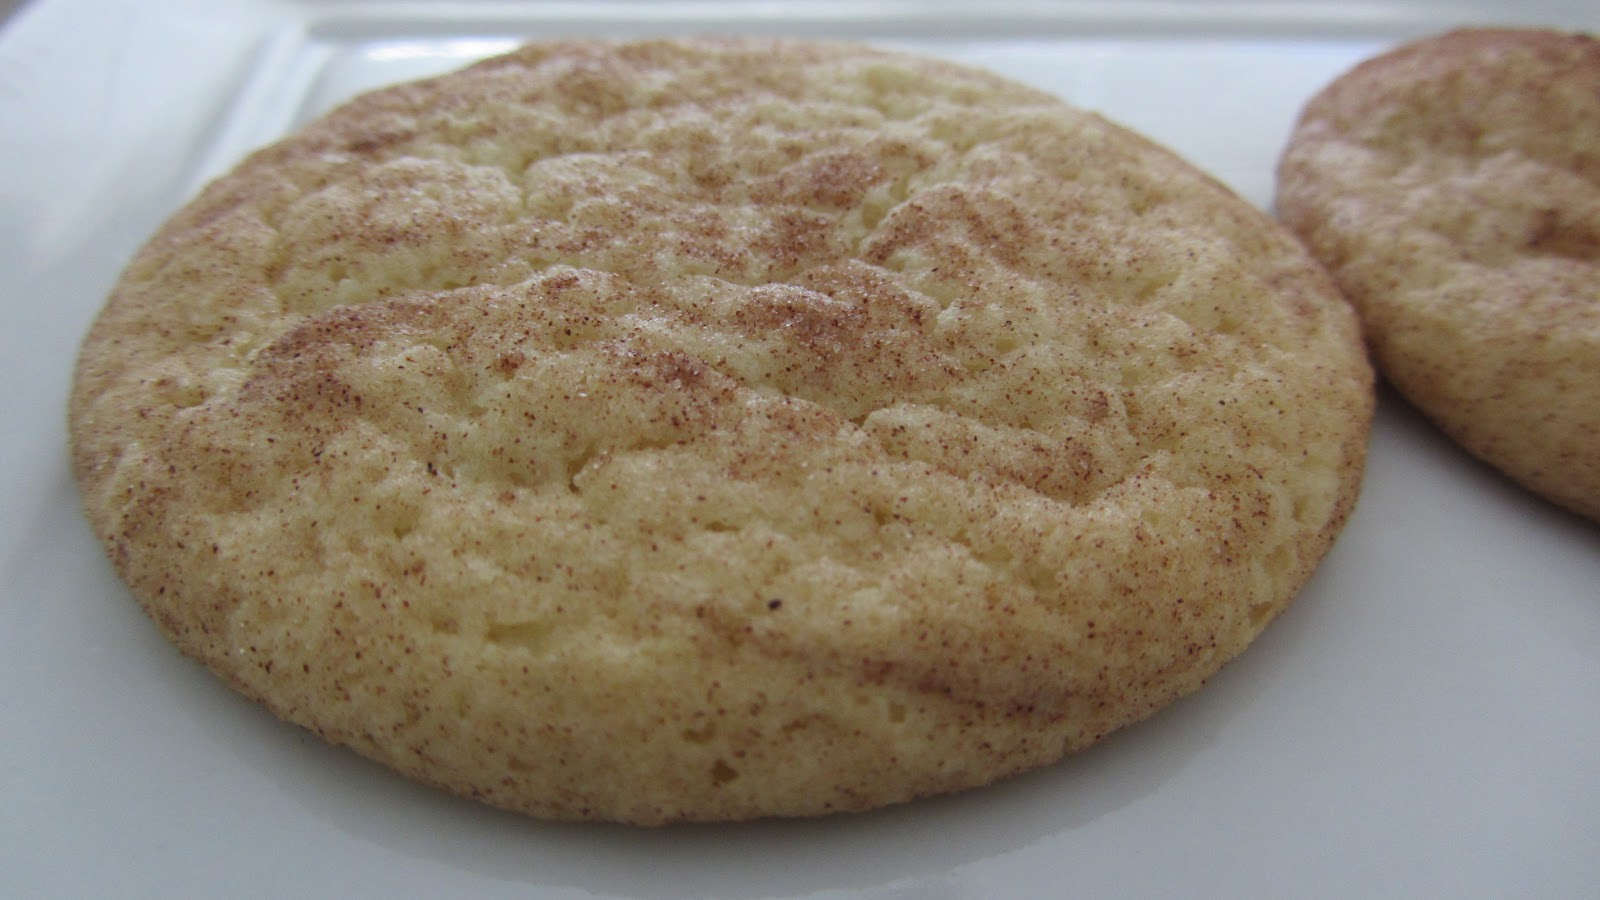
Many recipes use cream of tartar. It is quite expensive at the store. A tip that a grocery store employee gave me was to use cornstarch as a substitute since the texture/consistency was the same. I decided to do without it altogether. I went with good ole Martha!
Martha Stewart’s Snickerdoodles
makes about 1 1/2 dozen
makes about 1 1/2 dozen
2 3/4 cups all-purpose flour
2 tsp baking powder
1/2 tsp coarse salt
1 cups (2 sticks) unsalted butter, room temperature
1 1/2 cups sugar
2 large eggs
...and...
2 tbsp sugar
2 tsp ground cinnamon
2 tsp baking powder
1/2 tsp coarse salt
1 cups (2 sticks) unsalted butter, room temperature
1 1/2 cups sugar
2 large eggs
...and...
2 tbsp sugar
2 tsp ground cinnamon
Preheat oven to 350F. Sift together flour, baking powder and salt into a bowl. Put butter and 1 1/2 cups sugar in the bowl of an electric mixer fitted with the paddle attachment. Mix on medium speed until pale and fluffy, about 3 minutes. Mix in eggs. Reduce speed to low; gradually mix in flour mixture.
Stir together cinnamon and remaining 2 tablespoons sugar in a small bowl. Shape dough into 20 (1 3/4-inch) balls; roll in cinnamon sugar. Space 3 inches apart on baking sheets lined with parchment paper.
Bake cookies, rotating sheets halfway through, until edges are golden, 12 to 15 minutes. Let cool on sheets on wire racks. Cookies can be stored between layers of parchment in airtight containers at room temperature up to 3 days.

I used an ice cream scooper to make the balls of dough even. My cookies were all about the same size. Lined my pans with silpat (non-stick silicone). I love using silpat since you can remove them from the pan. It leads to quicker cooling time.
These snickerdoodles were perfect...chewy cookies that were not too sweet.
Enjoy!!!
Sunday, June 17, 2012
Salted Caramel Ice Cream
Summertime is a perfect opportunity to make sweet treats. I, myself, eat ice cream all year round but that's just me. Lately, I've been wanting to try a salted caramel ice cream recipe. My favorite one is from Carmela Ice Cream in Pasadena, CA.
Whenever I try a recipe, it means that I have sifted through many many of them until I finally have a winner. This one is from Cooking Light. Debated for weeks until I purchased heavy cream. Yes, I know that this recipe only calls for 1/4 cup of it but I usually make my ice cream without it.
Salted Caramel Ice Cream Recipe (from Cooking Light)
Cook Time: 10 minutes Prep Time: 10 minutes
Refrigerate Time: 2 hours
Ingredients:
3 1/2 cups 2% milk (I used Vitamin D milk)
3 large egg yolks
1 1/2 cups brown sugar
1/4 cup heavy cream
1 Tbsp butter
1/2 tsp sea salt
1/2 tsp flake salt
Directions:
In a medium pot, heat up milk (but not to a boil). Whisk in egg yolks. Remove from heat.
In another pot, put the brown sugar, heavy cream, and butter in on low heat for three minutes. After the sugar mixture is done. Remove from heat. Add sea salt. Pour the sugar mixture slowly into the milk mixture stirring constantly.
Place mixture in the refrigerator for at least two hours. When mixture is cold, follow directions for your ice cream maker. (It takes about half an hour.)
When serving your salted caramel ice cream, scoop ice cream into bowls. Sprinkle some flake salt or sea salt on top of the ice cream.

Enjoy!!!
Whenever I try a recipe, it means that I have sifted through many many of them until I finally have a winner. This one is from Cooking Light. Debated for weeks until I purchased heavy cream. Yes, I know that this recipe only calls for 1/4 cup of it but I usually make my ice cream without it.
Salted Caramel Ice Cream Recipe (from Cooking Light)
Cook Time: 10 minutes Prep Time: 10 minutes
Refrigerate Time: 2 hours
Ingredients:
3 1/2 cups 2% milk (I used Vitamin D milk)
3 large egg yolks
1 1/2 cups brown sugar
1/4 cup heavy cream
1 Tbsp butter
1/2 tsp sea salt
1/2 tsp flake salt
Directions:
In a medium pot, heat up milk (but not to a boil). Whisk in egg yolks. Remove from heat.
In another pot, put the brown sugar, heavy cream, and butter in on low heat for three minutes. After the sugar mixture is done. Remove from heat. Add sea salt. Pour the sugar mixture slowly into the milk mixture stirring constantly.
Place mixture in the refrigerator for at least two hours. When mixture is cold, follow directions for your ice cream maker. (It takes about half an hour.)
When serving your salted caramel ice cream, scoop ice cream into bowls. Sprinkle some flake salt or sea salt on top of the ice cream.

Enjoy!!!
Thursday, April 5, 2012
Chewy Coconut Cookies
My dear friend is a coconut lover. Her husband doesn't like it so she doesn't bake coconut desserts often. This is one of the baked goods for her birthday...chewy coconut cookies. My preference was finding a recipe where the cookie was slightly crunchy on the edges and chewy in the inside. These were perfect!

Chewy Coconut Cookies
Prep Time: 20 min Bake Time: 10 min
Yields: 3 dozen cookies
Ingredients:
1/2 cup brown sugar
1/2 cup granulated sugar
1/2 cup butter (1 stick)
1 1/4 cups flour
1/2 tsp baking soda
1/4 tsp salt
1 egg
1 tsp coconut extract
1 cup shredded coconut
Directions:
Preheat the oven to 350F. Cream sugars and butter. Add egg and mix well.
In another bowl, mix the dry ingredients: flour, baking soda, salt.
Now, pour the dry ingredients into the first bowl to mix.
Add coconut extract and shredded coconut. Stir until there is coconut in all the batter.
Make little flattened balls of coconut to place on your baking pan or silpat (whichever you prefer).
Mine are about 2-3 inches in diameter.
Bake for 10 minutes. Initially when you take them out of the oven, they will still be soft. Remove from heat to let them cool.

I wrapped mine in plastic, put tissue paper around it since it was a gift.

Share them with your coconut-loving friends.

Enjoy!!! ;)

Chewy Coconut Cookies
Prep Time: 20 min Bake Time: 10 min
Yields: 3 dozen cookies
Ingredients:
1/2 cup brown sugar
1/2 cup granulated sugar
1/2 cup butter (1 stick)
1 1/4 cups flour
1/2 tsp baking soda
1/4 tsp salt
1 egg
1 tsp coconut extract
1 cup shredded coconut
Directions:
Preheat the oven to 350F. Cream sugars and butter. Add egg and mix well.
In another bowl, mix the dry ingredients: flour, baking soda, salt.
Now, pour the dry ingredients into the first bowl to mix.
Add coconut extract and shredded coconut. Stir until there is coconut in all the batter.
Make little flattened balls of coconut to place on your baking pan or silpat (whichever you prefer).
Mine are about 2-3 inches in diameter.
Bake for 10 minutes. Initially when you take them out of the oven, they will still be soft. Remove from heat to let them cool.

I wrapped mine in plastic, put tissue paper around it since it was a gift.

Share them with your coconut-loving friends.

Enjoy!!! ;)
Friday, February 17, 2012
Apple Squares
Last night, I was looking for something to eat but nothing really looked appetizing for a snack. So I decided to bake Apple Squares. Apple is one of my least favorite fruits *and I'm a teacher...go figure*; however, I love apples when they are baked!!
The most time-consuming part of baking apple squares has to be the peeling, coring, dicing of the apple. I am aware that the apple peeler exists but don't think I would actually use it since from time to time since I only need ONE apple. Besides, I have seen the demos at the stores; seems to me that there is a lot of apple wasted when you use those gadgets! Total time for me to prep/bake this from start to finish was about 40 minutes (bake time is 30 minutes). The recipe says, "Ready in 55 minutes" but I guess I'm fast? haha..
One of my favorite things about baking is the fragrant, sweet aroma in the kitchen. Mmm..

Enjoy!!! =)
p.s. I had apple squares for breakfast this morning.
The most time-consuming part of baking apple squares has to be the peeling, coring, dicing of the apple. I am aware that the apple peeler exists but don't think I would actually use it since from time to time since I only need ONE apple. Besides, I have seen the demos at the stores; seems to me that there is a lot of apple wasted when you use those gadgets! Total time for me to prep/bake this from start to finish was about 40 minutes (bake time is 30 minutes). The recipe says, "Ready in 55 minutes" but I guess I'm fast? haha..
One of my favorite things about baking is the fragrant, sweet aroma in the kitchen. Mmm..

Enjoy!!! =)
p.s. I had apple squares for breakfast this morning.
Tuesday, February 14, 2012
What's for Dinner, vaLINtine??
For quite a while, I have wanted to make meatloaf and pecan pie from scratch for my hubby. He has expressed love for the two food items. So today, valentine's dinner consisted of quinoa meatloaf, sauteed arugula/spinach, soycutash (frozen corn, bell peppers, soy beans from TJ's), mini pecan pie tarts.
Traditional meatloaf is made with breadcrumbs. Quinoa took the place of breadcrumbs in my meatloaf. What I loved most about this meatloaf was the subtle Sriracha sauce. Click for the recipe. It says that it serves 5, but it's more like 3. Or maybe we are pigs! Lol..
My mini pecan pie tarts did not look like the picture in the recipe. Perhaps I'll have better luck next time. Think I changed the recipe so much by halving it so it didn't come out like that. *When halving it, I was supposed to put 3 oz of cream cheese in; but since I didn't want to open a new package, I only put 2. Haha.* Nevertheless, they were delicious!! Asked hubby if he wanted to share with others. He replied, "That they were his."
Mine looked more like mini pecan pie muffins. Oh, but they were sooo divine! Next time, I will be making the full recipe.


Traditional meatloaf is made with breadcrumbs. Quinoa took the place of breadcrumbs in my meatloaf. What I loved most about this meatloaf was the subtle Sriracha sauce. Click for the recipe. It says that it serves 5, but it's more like 3. Or maybe we are pigs! Lol..
My mini pecan pie tarts did not look like the picture in the recipe. Perhaps I'll have better luck next time. Think I changed the recipe so much by halving it so it didn't come out like that. *When halving it, I was supposed to put 3 oz of cream cheese in; but since I didn't want to open a new package, I only put 2. Haha.* Nevertheless, they were delicious!! Asked hubby if he wanted to share with others. He replied, "That they were his."
Mine looked more like mini pecan pie muffins. Oh, but they were sooo divine! Next time, I will be making the full recipe.

Hope you had a great day with you and yours!!

*Note: vaLINtine refers to Jeremy Lin on the NY Knicks. For those of you living in a cave, he's come out of nowhere (Okay, really from Palo Alto...norcal baby!!). The only reason he has had a chance to start as a point guard is because there was no one else. He's led the team to six straight Knick wins. Tonight, he made the 3-ptr with 0.5 sec left. Read more here..
Saturday, February 11, 2012
Chocolate Dipped Strawberries
Love it or hate it since it's extremely commercialized these days, Valentine's Day is the perfect excuse for sweets. The best thing is that strawberries are in season!! They are currently 2 (1 lb) for $3.

I am going to teach you how to make Chocolate Dipped Strawberries without a double boiler. Sure, it's cool when you have fancy smancy kitchen appliances, but you can use what you already have with the basics. All you need is a bowl and a little pot with a lid.

Double boiler:
Fill the little pot about 1/2 full of water. Bring to a boil. Then place the bowl on top of the pot. Note that the bowl needs to be big enough so that it doesn't fall into the pot. Ta-da!! You have a double broiler!!

Chocolate Dipped Strawberries
Prep Time: 40 min Cook Time: 10 min (Need two hours for the strawberries to completely harden)
Ingredients:
1 lb of strawberries
6 oz of chocolate (These are approximate since it depends on how many strawberries you want.)
sprinkles/nuts are optional (for decorating)
Directions:
Wash your strawberries. I like to put it in a huge bowl with water for at least 10 minutes. Then strain with a colander. It is very important that you work with DRY strawberries. To achieve this, grab a paper towel (on a flat surface) and start lining up the strawberries on top.

Usually, I wait for it to naturally dry for a bit. Then I pat it dry with the paper towel. (That is the reason I estimated prep time to be 40 minutes - for washing and drying.)
On to the double boiler that I created... When the water begins to boil, put chocolate (chunks or chips) into the bowl. For the chocolate to heat evenly, top the pot with the lid. If you see the chocolate begin to melt but think it needs more "help", grab a small spoon to stir.

Before you start dipping, make sure you create a flat surface with parchment paper. I used a 13x9 inch pan since you need the strawberries to sit flat to harden.
When the chocolate is melted, carefully dip each strawberry. Don't worry if they aren't so pretty. The trick to evening it out is to use your little spoon to smooth/spread the chocolate. Once you have the strawberry looking as desirably chocolate as you wish, place it on the parchment paper.
Afterwards, you can decorate the dipped strawberries (or leave it as is). The easiest way to decorate is to simply dip them into sprinkles/nuts or drizzle some melted chocolate (of another color, white) in a zigzag. This time, I decided to make letters out of my sprinkles. Did not even realize I was playing tic tac toe until the end. Haha!!

Put the whole pan, plate (or I have even placed parchment paper on a cutting board since it was a flat surface) into the refrigerator to harden.
Happy Valentine's Day!!

Enjoy these with your sweetie!!! ;)
*Note: Chocolate Dipped Strawberries are a make-the-day-before treat. I keep them in the refrigerator to harden overnight, not just for two hours.
Monday, February 6, 2012
Mint Buttercream Frosting #1 (Cream Cheese Frosting)
After a disappointing 49'ers loss to the Giants, the match up for Superbowl XLVI was set for the New York Giants versus the New England Patriots. In a way, I was a wee bit glad that the 49'ers weren't in the Superbowl because it saved me from sitting on the edge of my seat for another big game. Surprisingly enough, I watched the whole game. Shocking. Most of the time, I become bored with football as baseball has my heart.
In the spirit of watching the Superbowl with friends, I baked mint chocolate cupcakes. My favorite ones are from Dots Cupcakes in Pasadena, CA. Contemplated about whether or not to decorate my cupcakes blue with a red stripe...pipe NY or a big G or Giants... In the end, the verdict was to make the frosting green since mint chocolate frosting is usually green. That and the fact that making blue with red meant two different containers of frosting using different bags and tips for decorating. Instead, my decor was on the container. (I made more than 6 cupcakes but this is for pictures. lol)

Mint Buttercream Frosting #1
Prep Time: 15 minutes Cook Time: None
Serves: Frosts 18 cupcakes unless your cupcake is frosting:cake --> 50:50. lol.
Ingredients:
4 Tbsp butter
4 cups of Confectioner's Sugar (otherwise known as Powdered Sugar)
6 oz of cream cheese
2 tsp of mint extract (For different flavors, use vanilla, orange, coconut, etc extract, possibilities are endless!)
Directions:
Put all ingredients into a big mixing bowl. Use a mixer at a low speed to create frosting. Once the frosting is smooth, free of lumps, your frosting is done.
Adding color:
Stick a toothpick into the food coloring of your choice. Dab it into the frosting. *A little goes a long way.* Mix until the frosting is of the desired color. If it is not a dark enough color, use a clean toothpick to repeat process.
Frost cupcake using a butter knife or frosting tips. (Note: I used Tip 1M to frost mine. There may be a lesson on how to use tips in the future..)
Added the chocolate crunchies since that is what Dots Cupcakes puts on theirs too. YUM!!
*Frosted 18 cupcakes with this recipe. Approximate cost of 18 frosted cupcakes ~$6. Another reason to bake instead of buy. It would cost you $50...maybe more to buy at a cupcake store!!*


Enjoy!!
P.S. My favorite moment of Superbowl XLVI was when Ahmad Bradshaw stopped for about two seconds as he slowly sat down into the end zone. That was the game winning touchdown for the NY Giants.
*Note: I used Peppermint Extract since that's what I had on-hand. Next time, I will buy Mint Extract since Peppermint was a bit too minty.
In the spirit of watching the Superbowl with friends, I baked mint chocolate cupcakes. My favorite ones are from Dots Cupcakes in Pasadena, CA. Contemplated about whether or not to decorate my cupcakes blue with a red stripe...pipe NY or a big G or Giants... In the end, the verdict was to make the frosting green since mint chocolate frosting is usually green. That and the fact that making blue with red meant two different containers of frosting using different bags and tips for decorating. Instead, my decor was on the container. (I made more than 6 cupcakes but this is for pictures. lol)

Mint Buttercream Frosting #1
Prep Time: 15 minutes Cook Time: None
Serves: Frosts 18 cupcakes unless your cupcake is frosting:cake --> 50:50. lol.
Ingredients:
4 Tbsp butter
4 cups of Confectioner's Sugar (otherwise known as Powdered Sugar)
6 oz of cream cheese
2 tsp of mint extract (For different flavors, use vanilla, orange, coconut, etc extract, possibilities are endless!)
Directions:
Put all ingredients into a big mixing bowl. Use a mixer at a low speed to create frosting. Once the frosting is smooth, free of lumps, your frosting is done.
Adding color:
Stick a toothpick into the food coloring of your choice. Dab it into the frosting. *A little goes a long way.* Mix until the frosting is of the desired color. If it is not a dark enough color, use a clean toothpick to repeat process.
Frost cupcake using a butter knife or frosting tips. (Note: I used Tip 1M to frost mine. There may be a lesson on how to use tips in the future..)
Added the chocolate crunchies since that is what Dots Cupcakes puts on theirs too. YUM!!
*Frosted 18 cupcakes with this recipe. Approximate cost of 18 frosted cupcakes ~$6. Another reason to bake instead of buy. It would cost you $50...maybe more to buy at a cupcake store!!*

Simply delicious!!!

Enjoy!!
P.S. My favorite moment of Superbowl XLVI was when Ahmad Bradshaw stopped for about two seconds as he slowly sat down into the end zone. That was the game winning touchdown for the NY Giants.
*Note: I used Peppermint Extract since that's what I had on-hand. Next time, I will buy Mint Extract since Peppermint was a bit too minty.
Monday, January 23, 2012
Happy Year of the Dragon 2012!!! =D
HAPPY CHINESE NEW YEAR!!!
May the Year of the Dragon bring LUCK, PROSPERITY, and GOOD HEALTH to you and yours.

Note:
These daffodils from my backyard only bloom once a year during Lunar year. I potted it as a gift.
A traditional dessert is sweet rice cake (nian gao). I plan to make my own in the future but this time we were gifted Red Bean Nian Gao. It has a soft, chewy consistency. You could either microwave it for one minute (covered) or pan fry it (directions below). I sliced them into rectangular pieces of about 3/4 inches in height.
How to Pan-Fry Nian Gao (Dessert):
-- with two eggs and rectangular pieces of sweet nian gao
Whisk two eggs in a separate bowl. As a little girl, I was taught to whisk by using my chopsticks in a vertical circular motion. Dip each rectangular piece into the egg wash. Make sure you flip it over so that both sides have the egg wash. It's similar to how french toast is made.


ENJOY!!! =D
Note:
There will be egg wash left. I would recommend making french toast with it by adding 1/2 cup of milk, 1 teaspoon of vanilla extract, 1/4 teaspoon of cinnamon to the egg wash. Dip bread and pan fry as per the directions above. (Or you can cook the egg wash as scrambled eggs in a pan.)
May the Year of the Dragon bring LUCK, PROSPERITY, and GOOD HEALTH to you and yours.

Note:
These daffodils from my backyard only bloom once a year during Lunar year. I potted it as a gift.
A traditional dessert is sweet rice cake (nian gao). I plan to make my own in the future but this time we were gifted Red Bean Nian Gao. It has a soft, chewy consistency. You could either microwave it for one minute (covered) or pan fry it (directions below). I sliced them into rectangular pieces of about 3/4 inches in height.
How to Pan-Fry Nian Gao (Dessert):
-- with two eggs and rectangular pieces of sweet nian gao
Whisk two eggs in a separate bowl. As a little girl, I was taught to whisk by using my chopsticks in a vertical circular motion. Dip each rectangular piece into the egg wash. Make sure you flip it over so that both sides have the egg wash. It's similar to how french toast is made.

Place a frying pan on medium heat. Put a couple pieces in the pan carefully so that none of the other pieces touch. Cover with a lid. Cook three minutes per side. Serve immediately.

ENJOY!!! =D
Note:
There will be egg wash left. I would recommend making french toast with it by adding 1/2 cup of milk, 1 teaspoon of vanilla extract, 1/4 teaspoon of cinnamon to the egg wash. Dip bread and pan fry as per the directions above. (Or you can cook the egg wash as scrambled eggs in a pan.)
Subscribe to:
Posts (Atom)