Last week, I saw a produce special of $0.33 per red bell pepper. This is what I came up with from my pantry. I've realized that the reason why my grocery bill is lower than other people's (besides being a great shopper, buying seasonal produce, etc) is that buy little or no meat. Originally, I wanted to put ground turkey into my stuffed red bell peppers. However, after the addition of pine nuts and walnuts, it wasn't needed.
Stuffed Red Bell Peppers
Prep Time: 25 min Bake Time: 20 min
Ingredients:
1/2 cup onion (diced)
1 cup frozen spinach
1 medium red potato (diced)
1/4 cup pine nuts
2 large red bell peppers
8 mushrooms (diced)
1/4 cup walnut (in pieces)
3/4 cup cooked brown rice
some oil (I used grapeseed oil)
salt and pepper to taste
Directions:
In a pan on medium heat, caramelize the diced onions. Add potatoes about three minutes later. Onions and potatoes take longer to cook. Next add the frozen spinach and pine nuts. Throw in the mushrooms, walnuts, cooked rice last. Salt and pepper to taste.
The filling can be easily changed based on what is in your pantry. The staples for this stuffing are onions, spinach, and mushrooms.
Cut the bell peppers in half. You can either make the incision by taking the top off like when people carve pumpkins or you can halve it the other direction. This depends on the shape of your bell pepper.
Spoon the filling to stuff the pepper.
I sprinkled some parmesan cheese on top for slight crunchiness. After baking the stuffed bell pepper for 20 minutes. It is done. There you have it!! Vitamin C, vitamin K, iron, omega-3 fatty acids, antioxidants, fiber, etc of textured goodness. =)
Enjoy!! =)
*Note: You can do it stuff small or large bell peppers.
Healthy meets Delicious.. They fall in LOVE!! ;) *Click on the pictures to enlarge.
Monday, October 15, 2012
Saturday, October 13, 2012
Simple Brussels Sprouts
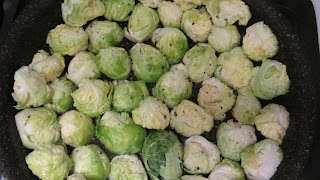
My favorite salad is my brussels sprout salad that I make every week or two. That salad uses the leaves. It is a waste to throw away the core when it's half of what you buy. I cook the middle. It is like buying small brussels sprouts.
My husband likes this simple preparation. On other occasions when I have made it fancier with different spices and such, this has been his preference. Makes my life easier too since it takes less time. *wink*
Simple Brussels Sprouts
Prep Time: 10 min Cook Time 8 min
Ingredients:
brussels sprouts (halved)
some olive oil
salt and pepper to taste
Cut the brussels sprouts in half. Put some olive oil in the pan. Place the halved sprouts flat side down.
Cook covered on medium heat for about five minutes.
Remove the lid, move the brussels sprouts around so that the other side gets some of the char too (about another three minutes). Sprinkle salt and pepper to taste.
Simple. Tasty.
Enjoy!!! =)
My husband likes this simple preparation. On other occasions when I have made it fancier with different spices and such, this has been his preference. Makes my life easier too since it takes less time. *wink*
Simple Brussels Sprouts
Prep Time: 10 min Cook Time 8 min
Ingredients:
brussels sprouts (halved)
some olive oil
salt and pepper to taste
Cut the brussels sprouts in half. Put some olive oil in the pan. Place the halved sprouts flat side down.
Cook covered on medium heat for about five minutes.
Simple. Tasty.
Enjoy!!! =)
Friday, October 12, 2012
Ginger Sparkler
I bought some ginger recently to use in my cooking. Thought I would try to make some type of ginger drink. So I started to boil thinly sliced pieces of ginger with 1.5 - 2 cups of water in a little pot. Boil for 20 minutes for a spicy drink.
Placed several ice cubes into a big mug. Poured the boiled ginger water into the mug about 3/4 full. Add a tablespoon of honey. Stir until it dissolves. The ice cubes will cool down the drink quickly. To top off the drink, add 1/4 cup of sparkling water.
Ingredients: ginger, water, honey, sparkling water
Enjoy your ginger sparkler!! =)
Tuesday, October 9, 2012
Spinach Mac & Cheese
I LOVE SPINACH.
It is one of my favorite vegetables (besides broccoli and tomatoes). Raw, Steamed, Stir fried, in soups, you name it. My husband, on the other hand, does not enjoy spinach as much. The way to hide spinach and other nutritious vegetables is to turn it into a casserole or put it in a pasta dish. Since I had some macaroni in the pantry, I finally decided to make Spinach Mac & Cheese.
Spinach Macaroni & Cheese
Prep Time: 20 minutes Cook Time: 25 minutes
Ingredients:
12 oz macaroni
3 Tblsp butter
1/2 cup diced onions
1/3 cup flour
3 cups milk (the more fat, the better)
6 oz spinach (chopped)
2 cups cheese
Directions:
Prepare macaroni as per directions; boil a pot of water with a bit of salt. Cook macaroni for 8-10 minutes. Strain and set aside.
In a large pot, melt three tablespoons of butter. Sautee the diced onions to soften them. Whisk in 1/3 cup of flour. The mixture should be a brown color. Pour in the milk. Turn the heat up to high for 10 minutes. Add salt and pepper to taste.
Stir cheese into the mixture. Add chopped spinach to the mixture. Lastly, add cooked macaroni into the pot.
* I added fresh ground peppercorns on top.
Enjoy!! =)
TIPS:
1) I usually prepare and chop/dice veggies before anything else.
2) If you do not have macaroni in the pantry, you can use any kind/shape of pasta.
3) Stack the fresh spinach on top of each other so that you can chop more into strips at one time.
4) I was too excited about eating my dish. If I wasn't, I would have put it in a casserole pan. Sprinkle some breadcrumbs on top to create a crunchy top.
Tuesday, October 2, 2012
Fresh Santa Barbara Uni (Sea Urchin)
On a recent mini-vacation to Santa Barbara, we biked to the pier to Santa Barbara Fish Market to try fresh uni!!
It was the first time we have seen the sea urchin cleaning. They sell it for $5.95 per pound. The sea urchin is weighed. Ours came out to be a pound. Then the cleaning began.
The shucking tool was used to create a hole in the center. The uni is turned upside down. Guts flew out. It was pretty disgusting. I did not take pictures of the guts. With a large knife, the uni was cut in half. Working with the halves, the shucking tool helped scoop the uni from its shell. A container is filled with water and ice. The uni pieces were placed in the cold water to wash the rest of the guts off.
Our one pound live sea urchin turned into five pieces of sweet, fresh uni ready to enjoy...
This was the sweetest uni I've ever tasted!! FRESHEST and SWEETEST!!! =)
(Click on the picture for a larger view.)
On a side note, we ordered these gigantic oysters too. Hope Ranch Oysters were local oysters that they were charging only $1.09 each. Such a great deal since they chose good ones for us that were six inches long and 1.5 inch wide. WOW..
Now, that was a delicious afternoon snack!!! =)
Subscribe to:
Posts (Atom)